

Volume 47 - Spring 2019
Where the Laser Meets the Leather
Step-by-step laser cutting and Engraving Leather - by Sarah Pike
If you had ever told me that, as an artist trained in traditional figurative painting who works in stone lithography, I would end up running a laser cutting business, I wouldn't have believed you. But it was through my printmaking discipline and sensibilities that I came to work with laser cutting. And today I draw great satisfaction in helping artists-primarily bookbinders-bridge the gap between handcraft and new technologies.
In this article I will share a variety of laser cutting and engraving techniques for working with leather and parchment.
A Look at What's Possible
Laser cutters, which vaporize material using a pulsating beam of light, perform three main tasks: they cut, line engrave, and area engrave. When the laser cuts or line engraves, it follows the path of the line; when it area engraves it moves back and forth like an ink-jet printer. Note that in this context, engraving refers to the partial removal of material that can be performed at multiple depths [fig 1].
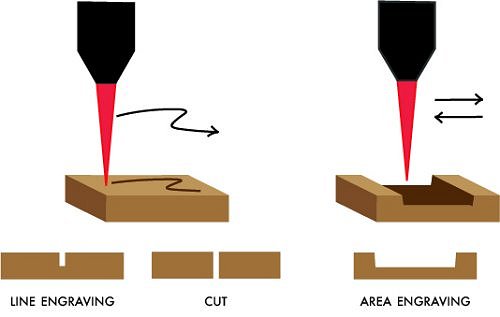
fig 1
The type of laser cutter you're most likely to come across at businesses like mine or at makerspaces and universities are CO2 lasers. These lasers can cut and engrave a variety of organic materials, such as paper, board, wood, leather, fabric, acrylic, and much more. That said, the question I most often get is, "Can you cut metal?" The answer is no: a fiber laser is needed for laser cutting metal. Due to their size and cost, fiber lasers are more often found at businesses that service industrial companies.
While I'll try to be as specific as possible, so many variables come into play that it's difficult to give universal guidelines. Laser cutter settings can vary greatly depending on how the leather was processed, the dye used, what part of the skin is being used, and the life of the animal. So for each project I undertake, I conduct a round of material testing as an essential, if sometimes time-consuming, first step. With laser cutting it's not unusual for the testing and prototyping phase to be lengthier than production. But not to worry, that's why I'm here with the knowledge and experience to help you solve problems and strategize an approach to challenges that may arise.
Now let me introduce you to five options of laser cutting and engraving leather and parchment, along with special considerations for each method.
Laser Cut Leather
Laser cutting is particularly well suited to projects where fine, precise cutting is needed [figs 2 & 3]
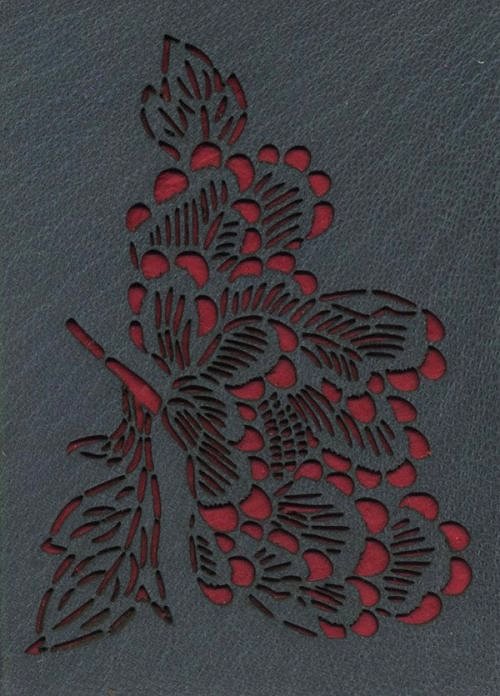
fig 2
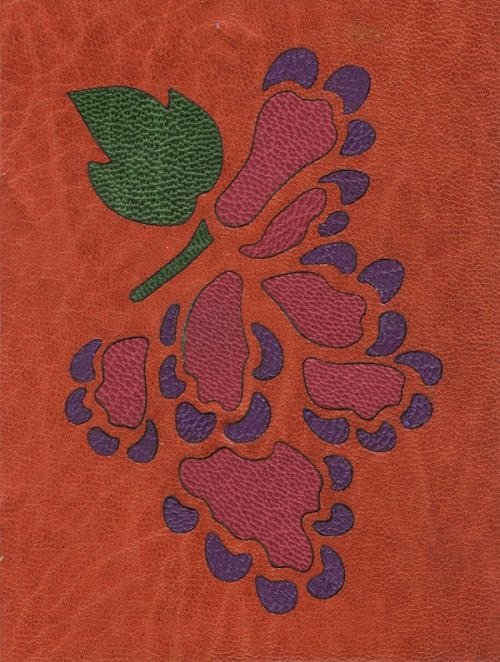
fig 3
Preparing Leather
- Depending on the intricacy and scale of your design, you'll generally want to work with leather that has been pared down. Leather is dense material and the density can vary across the skin so the power of the laser is often set slightly higher to insure that it will completely cut through in all. Paring leather to .018" (0.45mm) or less is optimal for marquetry, inlay, and small-scale designs.
- Tighten the leather by pasting off the backside and smoothing it out on Mylar or dampening it and drying it on a sheet of glass. This will not only help flatten the material but also create a tighter structure, resulting in a cleaner cut.
Special Considerations
- While a laser cutter can cut very intricate designs at a small scale [fig 3], there is a threshold. A good rule of thumb, though there are always exceptions, is that your thickest line shouldn't be narrower than the thickness of the material. When working with small-scale images, do a test cut to see if the image or material needs to be altered.
- Laser cutters burn material away, which can create a char residue on the cut edges. When leather is pared down, the residue is minimal or may not be noticeable. But when the leather is thicker, the residue may come off on your hands. Pasting off the face of the leather or using low tack mask can help protect the leather during production and assembly.
- For marquetry or interlocking pieces, kerf is adjusted in the digital file. Test the material for kerf loss, adjust the file, then test again-making additional adjustments as needed. Laser cutters are super precise but there is a limit to their tolerance and because of density variation in a skin, kerf loss can slightly vary. Sometimes expectations of "perfection" need to be adjusted.Laser Engraved Leather
Laser engraving leather can achieve an embossed look. While many leathers turn darker when engraved, some turn lighter.
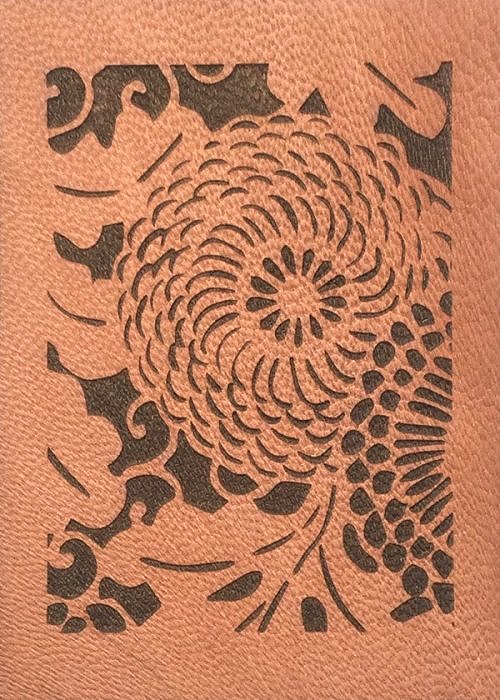
fig 4
Special Consideration
- The effect of laser engraving leather varies greatly depending on how the leather was processed and, if colored, the nature of the dye. With some leathers, the engraved area turns a lighter color; with others, it turns darker [fig 4]. You might be able to get a range of values by changing the settings. Again, testing is essential, as it's difficult to predict how a particular leather will react to engraving.
- Depending on how powerful the setting is, laser engraving can leave a charged residue in the engraved area. Pasting off the face of the leather or using low tack mask can help protect the leather. Sometimes when this residue is brushed away it reveals a lighter or modelled area.
Laser Cut Parchment
Laser cutting expands opportunities for creating pierced parchment [fig 5].
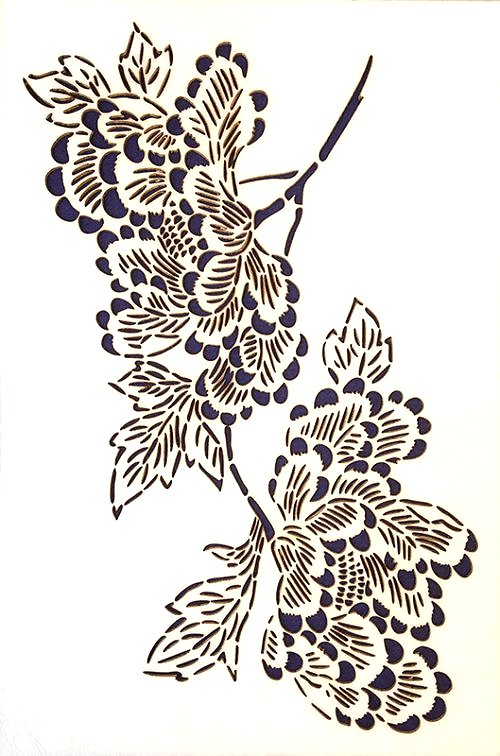
fig 5
Preparing Parchment
- While preparing parchment for laser cutting is best tackled on a case-by-case basis, one of the most important prerequisites is that the parchment lie flat. A parchment's susceptibility to changes in humidity and a propensity to return to the shape of the animal can present a challenge. You can use double-sided tape to temporarily adhere the parchment to the laser bed.
Special Considerations
- Optimal thickness for laser cut parchment is a bit tricky. The thinner it is, the easier it is to cut. But if the parchment is too thin, the heat of the laser can cause it to flex and distort.
- Since laser cutting is a heat-based method, you'll most likely see discoloration on the cut edge [fig 6]. The darkness of the color will vary depending on the type of skin and the thickness.
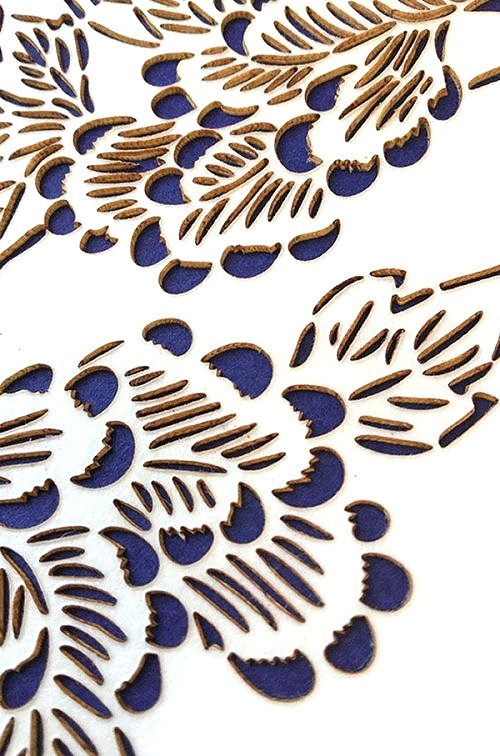
fig 6
Laser Engraved Parchment
I am a particular fan of techniques that are unique to the laser cutter. Laser engraved parchment is one of these. When I first started experimenting, I thought I would achieve a watermark effect similar to laser engraving Japanese paper [fig 9]. But instead of making the engraved area more transparent when I laser engraved the parchment, something else wonderful happened. The areas where the laser hit turned white [fig 7]. Instead of created a recessed engraved area the surface is ever so slightly raised.
However, if the laser is adjusted to a higher setting, the engraved area does become recessed and turns darker. What is fascinating about this is that the texture produced varies depending on the type of animal and how deep in the epidermis the laser penetrates [fig 8].
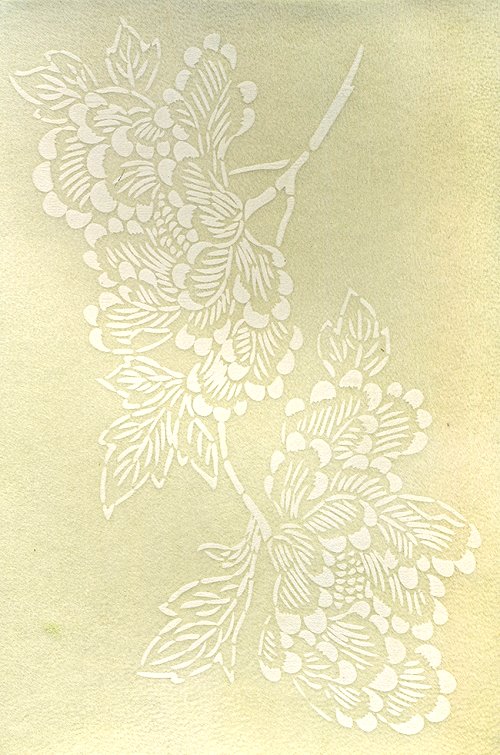
fig 7
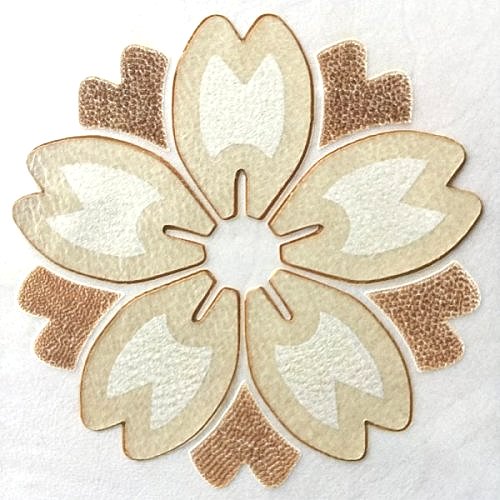
fig 8
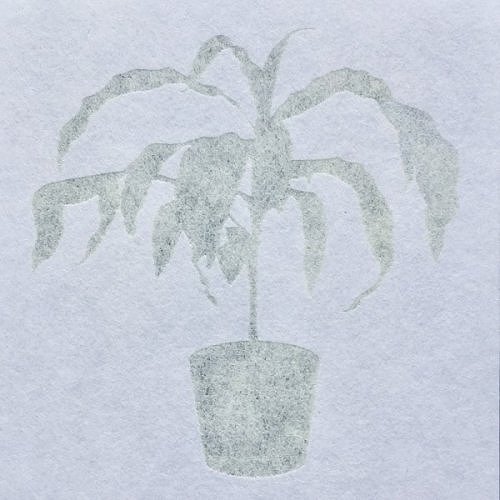
fig 9
Special Considerations
- All the same special considerations that apply to laser cutting parchment, above, also apply to engraving. Here, the flatness of the material is even more important because swells can change the distance between the laser and the material, turning the engraved area off-white or light tan.
- Engraving settings can change, depending on where you're engraving on the skin. Plan on testing on different areas of the skin and expect the amount of overage to be high.
Laser Engraved Die Stamp with Laser Cut Inlay
Laser engraved die stamps expand opportunities for embossing texture and images into leather using non-heat means. In fig 10 the laser cutter was used in three ways:
- The shape of the fox was laser cut out of card stock, then glued onto board to create a recess.
- The leather inlay was laser cut.
- An acrylic die stamp was cut and engraved to transfer lines and texture to the inlay.
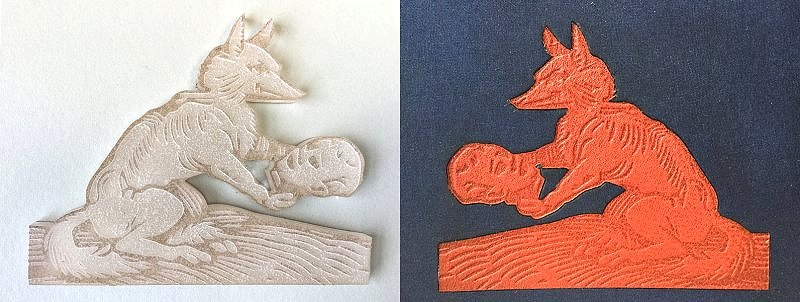
fig 10
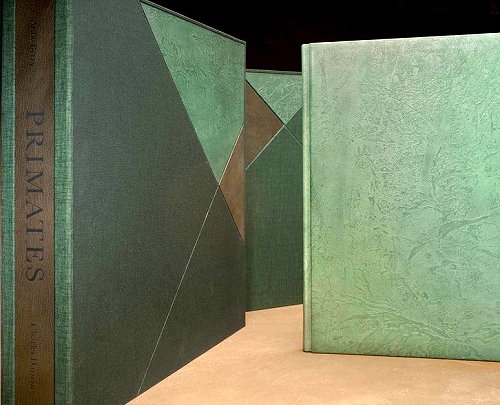
fig 11
Another example of the use of laser engraved acrylic die stamps can be seen in Amy Borezo's binding for Primates, published by 21st Editions [fig 11]. For this project I laser engraved two 15" x 15" plates and one thinner plate for the spine. They beautifully embossed the leather with an image of a forest, rendering a lost and found effect.
Special Consideration
- Laser cutters work by pulsating light. You can set the PPI, or pulses per inch, at different resolutions to either accentuate or diminish the visibility of these pulses. Depending on the image and the engraving process, a diffusion dither may be visible on very close inspection.
From laser cut leather to engraved parchment and acrylic die stamps laser cutters offer a range of options for bookbinders and leather workers but this is only the beginning. There is so much more they can do, including cutting and engraving binders board, custom acrylic gluing templates, and fine paper cutting. The opportunities are endless.
Sarah Pike is an artist and owner of FreeFall Laser, a laser-cutting studio in the United States specializing in creating custom work for artists and designers. She has spoken and given demonstrations on innovative laser cutting techniques at the American Institute for Conservation Annual Meeting in Houston, Texas; SNAP International Printmaking Symposium in Rhine, Germany; and SGC International Conferences in Portland, Oregon and Dallas, Texas.
Stay in touch, share your ideas with me, and get inspired by signing up for Adventures in Laser Cutting, my monthly newsletter on innovative laser cutting techniques and projects:
Sarah Pike
sarah@freefall-laser.com
www.freefall-laser.com
Skin Deep - Volume 47 - Spring 2019
Download Skin Deep - Volume 47 in PDF Format