

Volume 41 - Spring 2016
Japanese Stab Binding
A Tutorial - Flexible Cover with 3-hole Stitching - by Tiffany Eng
For those interested in making books, Japanese stab bindings are an ideal place to start. They are simple, don't require many tools, and are endlessly customizable. Today we'll be starting with the easiest of the stab bindings, a simple three hole binding. By using a flexible material as the front and back cover, no special cover construction is required, and punching the holes can be done easily.
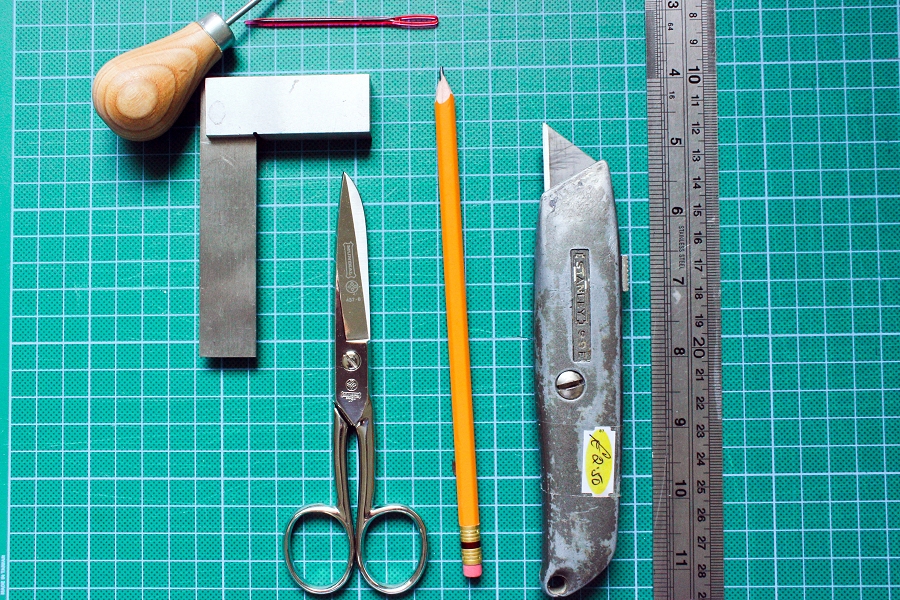
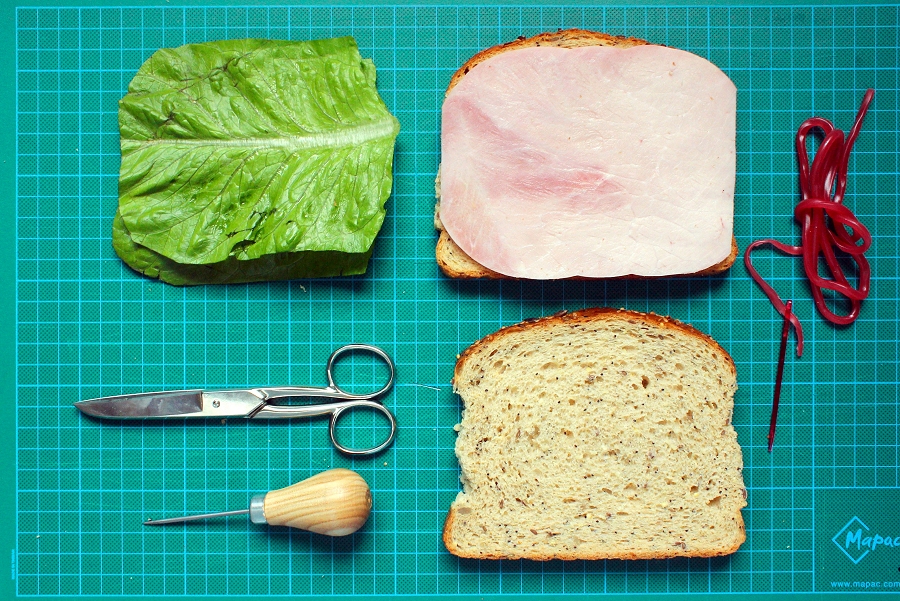
Tools:
- ruler
- craft knife with a sharp blade
- scissors
- cutting mat, or surface to cut on
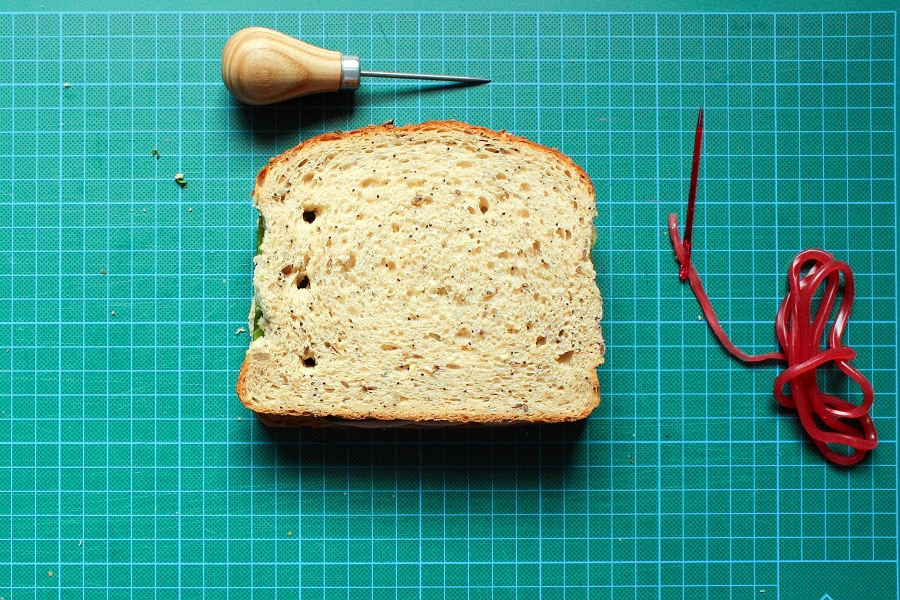
- awl or nail and hammer for punching holes in your book
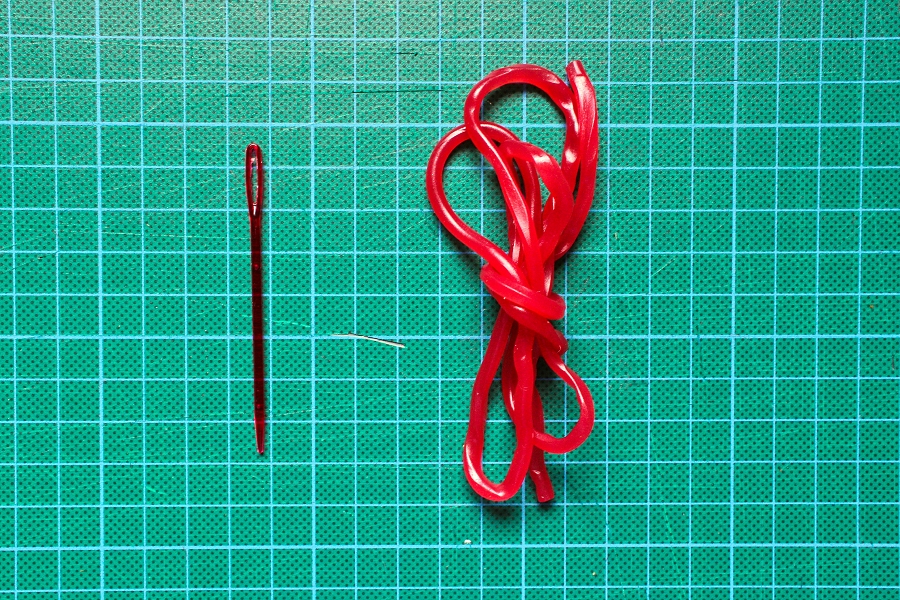
- large needle
- bulldog clip to hold pages together while sewing (optional)
- metal square to ensure straight cuts (optional)
Materials:
- 2 pieces heavyweight material for the front and back covers of the book
- 5-10 sheets of lightweight material for the textblock
- binding thread, yarn, ribbon, or any long material to stitch with
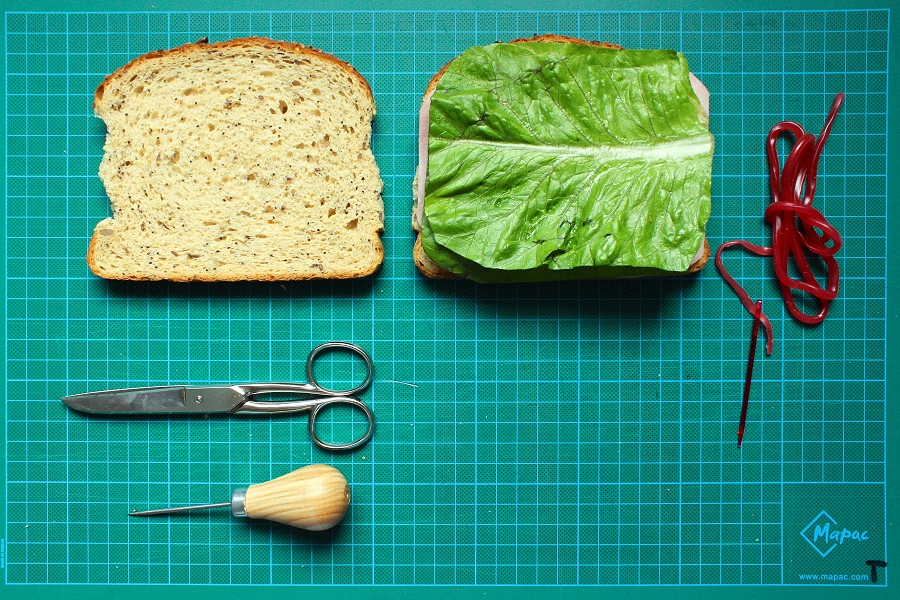
After obtaining all your materials, begin by cutting all your pages to same size as the covers. For nice straight edges in the book, it is best to use a ruler and knife to cut the pages to size. These pages make up the 'textblock' of your book.
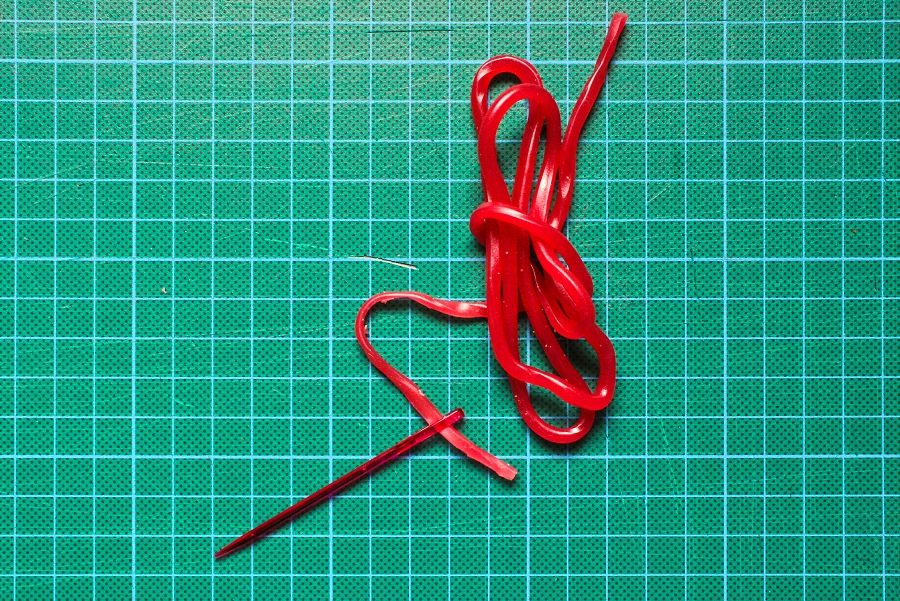
Cut a length of your thread to four times the height of the book, and thread it through the needle in preparation for the sewing stage
Sandwich the textblock between the two covers you have chosen, making sure that the pages are lined up on all sides.
If using a bulldog clip to hold the pages together as you stab and sew, then at this stage, carefully clamp the pages together on the right hand side of the book without disturbing the alignment of the leaves. Using an awl, or nail and hammer, carefully punch three holes ¾ inch away from the edge of the book. Make sure the holes are aligned with each other and evenly spaced.
Using the needle and thread, enter the first hole from the front of the book and pull the thread through, leaving a few inches of the thread in the front.
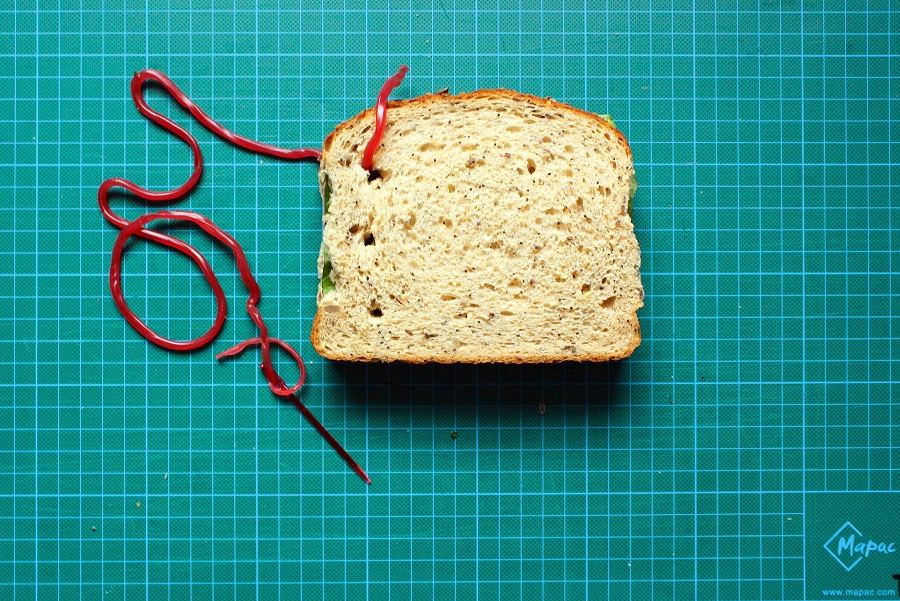
Take the thread over the top edge of the book and enter the first hole through the front of the book again. Pull the thread firmly to tighten. The thread is now at the back of the book.
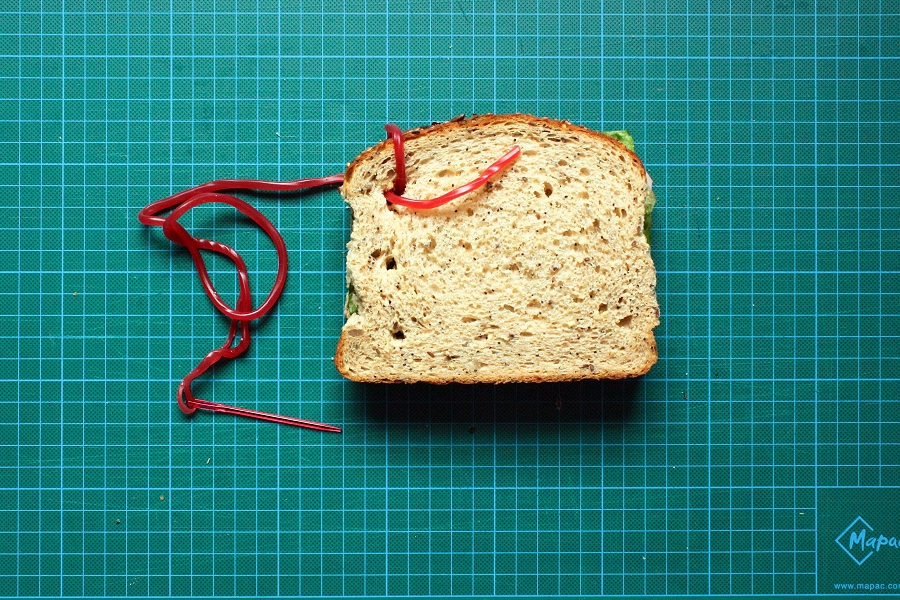
Take the thread from the back of the book, over the right edge of the book and back into the first hole through to the front of the book. Then follow by taking the thread through the second hole, this time entering from the back of the book. The thread is now at the front of the book, at the second hole.

Wrap the thread around the left edge of the book and back up through the second hole. Take the thread from the second hole, through the third hole from the front to the back.
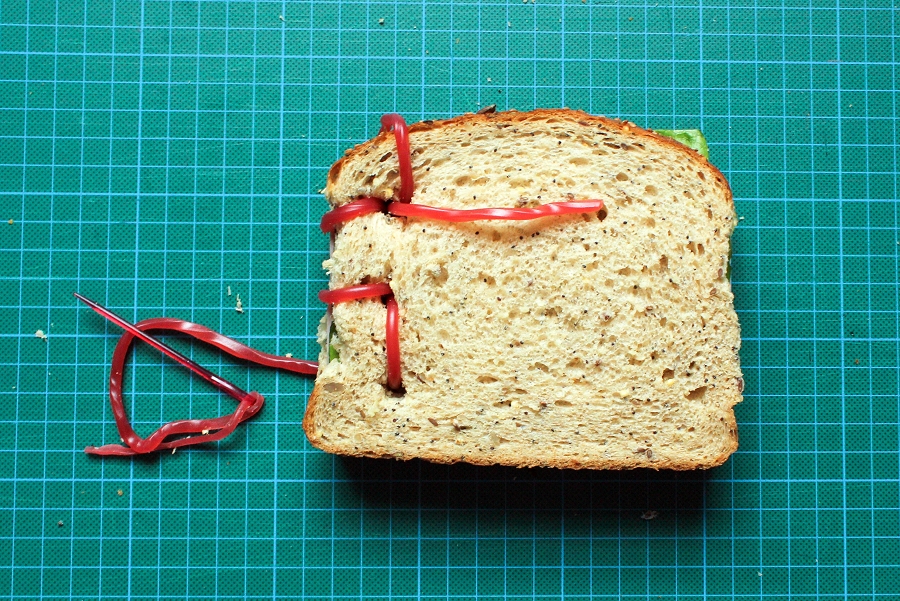
Wrap the thread around the right edge of the book and through the third hole again from front to back. Take the thread from the back of the book around the bottom edge of the book, and enter the third hole again from front to back. Take the thread from the third hole and up through the back of the second hole. To finish, tie the threads together tightly in a double knot, and cut the loose ends.
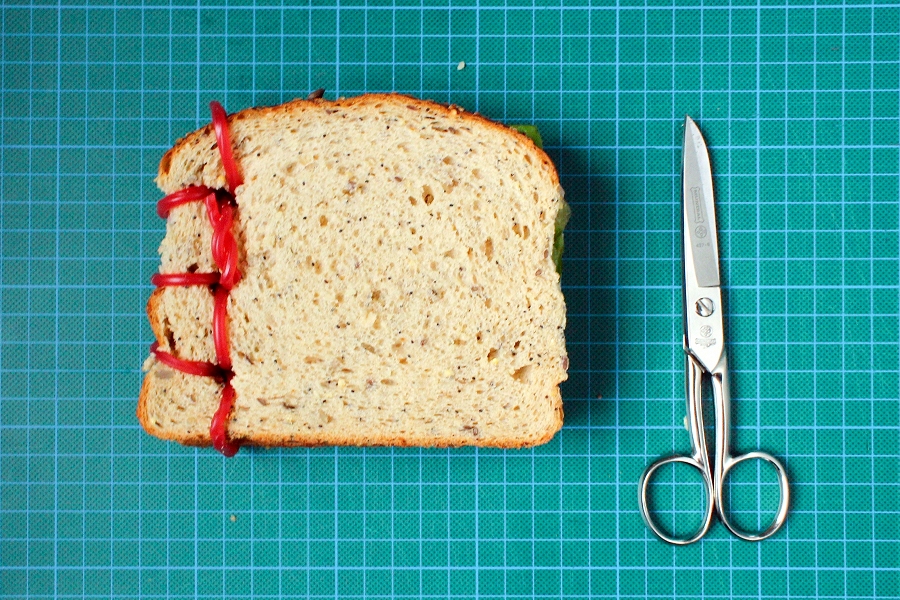
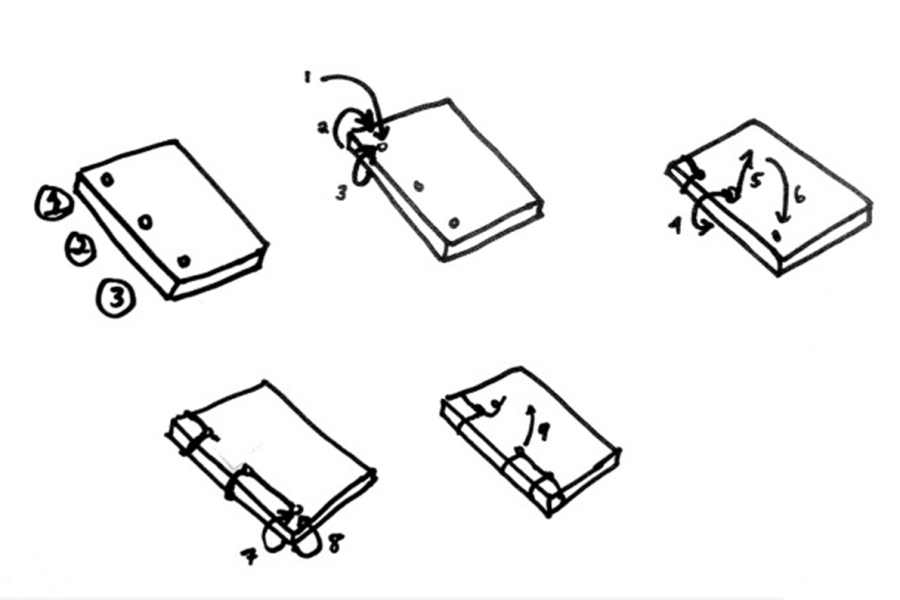
Diagram of sewing pattern
If you have access to finishing equipment, the covers of the book can be finished with gold foil lettering.
Congratulations, you've finished your first Japanese stab sewn book!
Tiffany Eng is a book conservator. She has an MA in Conservation of Books and Library Materials from West Dean College and a BFA from the Alberta College of Art and Design. She works at the Parliamentary Archives in the Collection Care department. In her spare time she enjoys making art, and thinking of silly jokes. For any questions, amateur fortune-telling, or if you just want to chat, please feel free to contact her at tiffanybeng@gmail.com.
Skin Deep - Volume 41 - Spring 2016
Download Skin Deep - Volume 41 in PDF Format