

Volume 45 - Spring 2018
A Camera Restoration
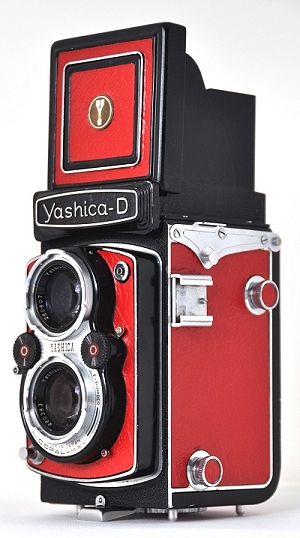
My Yashica 'D' - An interesting project - by Göran Årelind
I managed to obtain the camera for a very low price, but it was in a terrible condition. This Yashica D was my latest acquisition for my collection and it was going to take many hours of work to restore!
Firstly, and most importantly, it had to work as intended. All that was left of the original 'leather', had to be removed. It was obvious that I had to get a new 'suit' for this camera, but made up my mind on this later in the restoration process.
After a day's work, the camera was dismantled into small pieces, with only the shutter left to be taken apart. I cleaned all of the parts in alcohol and with the help of an ultrasound cleaner, obtained good results. But I noticed that the old glue on the body had still not been totally removed. Really sticky this glue!
I had to solve the 'glue issue' another way. I placed all of the parts in a plastic tub, added 'T-red', a type of solvent, and left it to do its thing overnight. Next morning it was rather easy to get all of the plates clean and free of grease and glue.
Now it was time to look over the 'heart' of the camera - the shutter with lenses! This took a full day to complete. The next day began the most interesting task - assembly.
This is a mechanical camera, the first D-model was on the market at the end of 1958 and the last in 1972. According to its serial number, mine was made in 1960. It's a fine mechanical puzzle. Grease and lubrication is essential for a safe function, but not too much that could cause it to fail, especially during outdoor use in the winter.
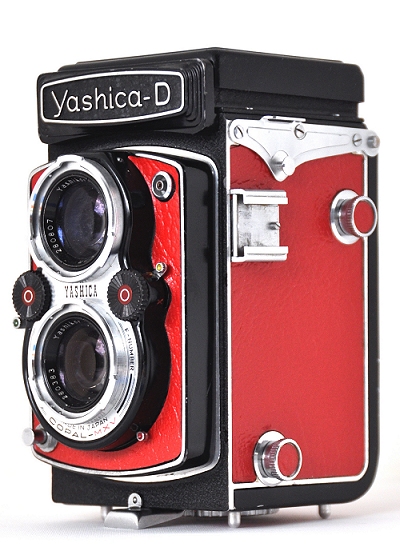
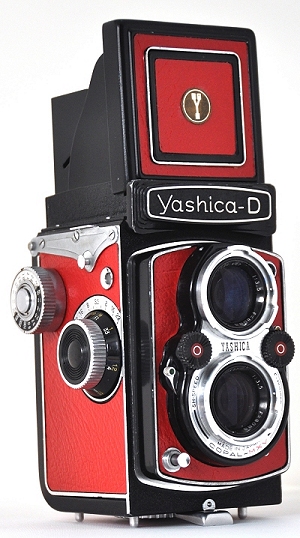
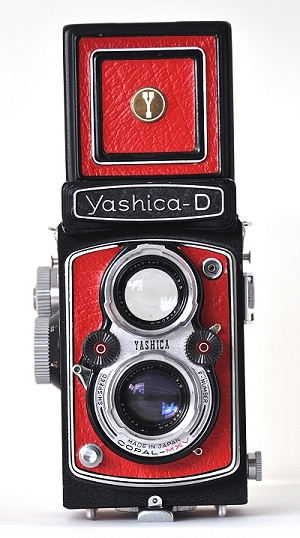
It was better to do this slow and steady to avoid future problems. During the assembly phase my thoughts turned back to the 'leather'. Black or Grey; the original colours? The metal work was painted black. NO, fire brigade Red! That's what I wanted. This camera would be different! I didn't care about the collector's value.
This was easier said than done! Where would I find real leather for this project? My search started at home, i.e. trying to find a local supplier in Sweden. After a week I gave up. The Internet gave me new hope, I found a company in the UK that might have what I was looking for, J Hewit & Sons Ltd. It took just a phone-call to inform them what I was looking for and a few days later I had samples of suitable skins in my hand, one of which was in 'my' red colour. Real professional help makes your choices easy! Now, I needed to order a skin. I had no previous experiences of working with leather, so this was going to be an interesting thing to learn.

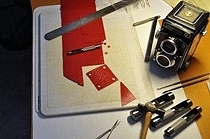
What tools did I need? Scissors, sharp scalpels, hollow punches, steel ruler, compass, callipers and a cutting mat. I tried to use some "old" leather as a template to cut out the first parts, but this was easier said then done! Leather is not like paper or plastic. When you put forces in to it, the material 'moves' a bit. After a failure on the very first attempt, I realized that I would have to change my cutting technique to compensate for these movements in the skin. Slowly learning from my mistakes, I got better and better. Cutting, fitting and adjusting until I felt pleased with the end result.
When the 'templates' were finished I had to measure against the camera and then transfer this to a rigid paper in order to make a new template that could be used for the final cutting of the leather. I had no idea how many hours I spent on this, but it was a lot for sure.
I came to the very last piece of leather to prepare, the back and underneath of the camera - in one piece only. The first two attempts failed and my patience became rather stretched.
The Internet saved me again! I found a company in the US, www.hugostudio.com, that undertakes laser-cutting. I contacted them and they were able to help me. I shipped some leather to them, and it was returned two weeks later, at a reasonable cost (USD 18.00).
With all the parts to hand, it only remained to get the leather on to the camera. I used an adhesive called Pliobond, a contact cement. I spread this carefully over the back of all the leather pieces and let it dry for some time.
The next step was to use Purell, a disinfection cream, on the parts where the leather was to mounted. Just a thin, evenly spread layer over the surfaces. Now I placed the skin on the surface. The Purell had to be 'wet' so I could 'fine-tune' the positioning of the leather. When I was happy with the result, I let the camera stand for 5-6 hours so the Purell could completely evaporate.
Lessons I learnt from this project:
- Think twice before you start! It needs time, patience and perseverance.
- Consider letting a professional firm cut the leather for you.
- Choose high quality materials and only select professional suppliers.
Yes, I learnt a lot. In my opinion the result was very good (also my friends like it) so, of course, I'm proud. However, there must be a balance between effort and outcome.
 |
 |
 |
Images courtesy of www.yashicatlr.com
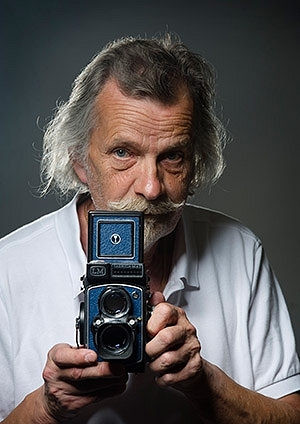
Göran Årelind - My father was a very serious amateur photographer and that's where my interest developed from.
My very first camera, in 1959, was a Zeiss Ikon Nettar 6x9cm. This was later followed by several small format cameras, mainly Nikon, including FM2, F2 and F3 models.
I prefer to work with manual focus lenses and most of the time I shoot using black and white film.
I bought my first TLR, a Rolleicord 3.5, from a friend in 1985. This was sparingly used and sat in a cupboard most of the time. The small format cameras were more practical in use, easier to carry and obtain film for. In 2003, I bought a Yashica-Mat which was not working too well so I decided to attempt to repair it. I found that this to be a very interesting project and it turned out quite successfully!
Later, more Yashica's were bought, mostly broken ones - just for the fun and challenge of repairing them!
Today, I have a small collection of 20 plus Yashica's of various model. They are all working and are used quite often. To these I have added a Mamiya RB67, some Rolleicords, a Rolleiflex Va, a Rolleiflex 2.8E an0d a Rollei Baby. Following my retirement in 2008, I have plenty of time for my cameras and photographic interests. I like to be out in the natural environment and most of my photos come from there.
For any camera aficionados out there, Göran may be contacted at: goran.arelind@telia.com
Skin Deep - Volume 45 - Spring 2018
Download Skin Deep - Volume 45 in PDF Format