

Volume 46 - Autumn 2018
Straightforward Slipcases
Achieving a result that fits well and looks good - by Glenn Malkin
This article first appeared in the 2016 edition of 'Bookbinder' and appears here with the kind permission of its author Glenn Malkin and the Society of Bookbinders.
Introduction
Making a slipcase is an important skill for any bookbinder. Slipcases protect and present books in an attractive way, which is why many collectors ask for them. They are straightforward to make and, with a little practice, you can make a perfectly fitting slipcase in just an hour or two. There are many different approaches to making a simple slipcase and it may be that you have already tried some of them. This article describes how I do it so, even if you have experience in making them, I hope there are one or two tips or alternative ways of doing things that you will find useful.
Measuring
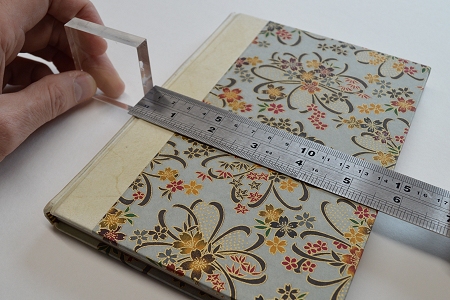
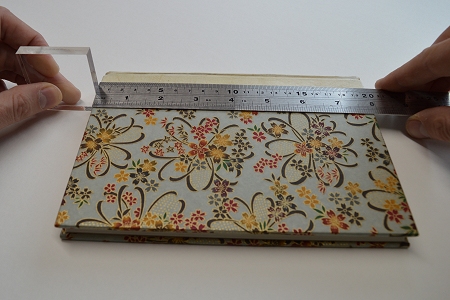
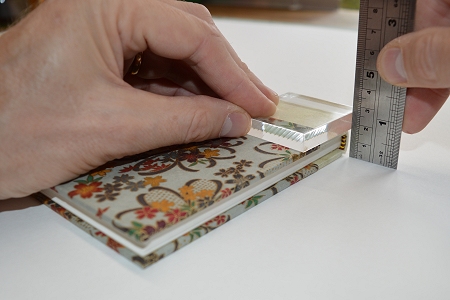
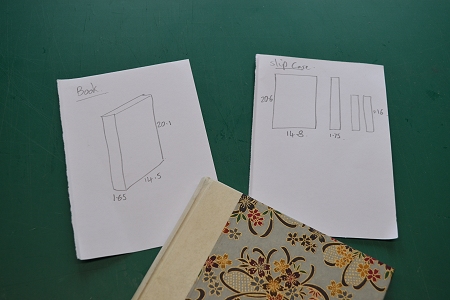
Probably the most important part of the whole process is the accurate measurement of the book. Here I will describe how to measure a book with a rounded spine. Use a good quality steel ruler. Make sure you have good overhead light and are measuring on a flat, firm surface. Measure the width [fig 1], length [fig 2], and depth [fig 3] of the book, taking several measurements of each dimension at different points on the book. Reading off your measurements against the edge of a block or a set square, as shown, will help ensure accuracy. Write down the maximum measurement of each dimension, to the nearest 0.5mm if possible. Keep the record of your measurements safe [fig 4] since, if you discover that your finished slipcase is too tight or too loose, you can come back to them and make adjustments accordingly.
 |
 |
 |
 |
 |
 |
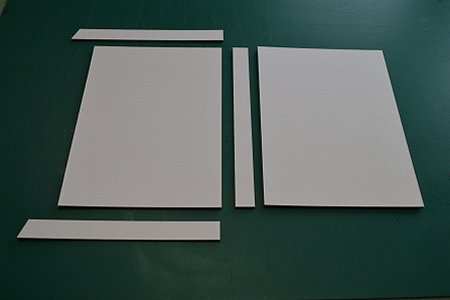
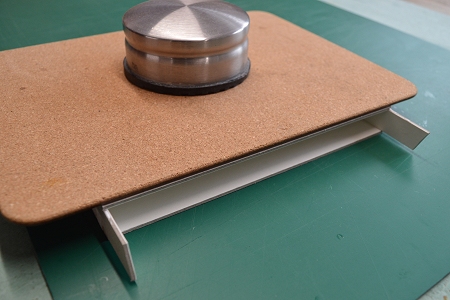
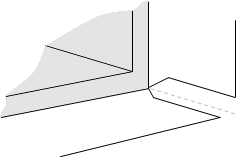
We now need to convert the book measurements to the sizes of the pieces of board needed for the slipcase. The standard five-piece slipcase is made up of two side boards and three edge pieces [fig 5]. I normally use 2mm grey board lined with either white or black paper on the side which will be inside the slipcase. Each side board must accommodate the thickness of the edge pieces in addition to the length and width of the book. The length will therefore be the book length plus 2 x edge-piece thickness, and the width will be the width of the book plus 1 x edge-piece thickness. However, there will also be the turn-ins of the covering material on the front edges of the slipcase to consider, and we therefore need to add about 0.5mm per turn-in to these measurements. This also gives the book enough room for slight movement without it being loose in the slipcase, as well as taking account of the thickness of the lining paper. I also add about 0.5mm or so to the book width measurement as I like the spine of the book to be just inside the edge of the slipcase for added protection. Therefore as a guide, when using 2mm grey board, I usually use the following measurements:
- Side boards (x2): (book length + 4mm + 1mm) x (book width + 2mm + 0.5mm)
- Spine edge piece (x1): (book length + 4mm + 1mm) x (book depth + 0.5mm)
- Top and bottom edge pieces (x2): (book width + approximately 2cm (to be trimmed off later)) x (book depth + 0.5mm)
When marking out measurements use a knife to make the marks rather than a pencil. This is much more accurate, since a pencil lead has a significant thickness leading to possible inaccuracies when cutting.
Cutting And Glueing
All edges must be cut as square as possible. Cut using a craft knife and a good metal ruler or straight edge. Make sure you use a sharp blade, cut vertically, and move the knife towards you whilst cutting, not from side to side. If you are having problems cutting the board edges vertically, try tilting your craft knife just a little as the bevel on the edge of the blade can otherwise cause it to cut at a slight angle.
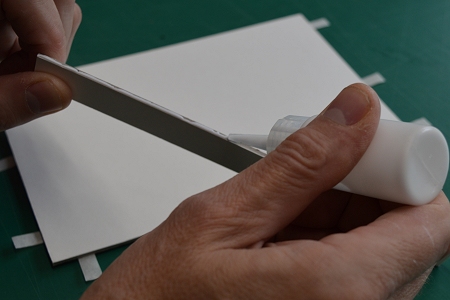
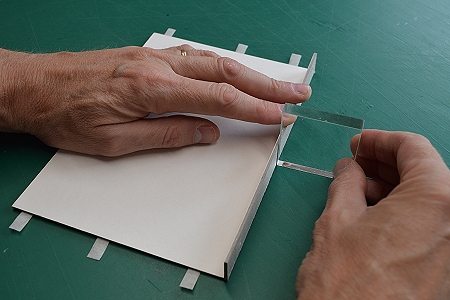
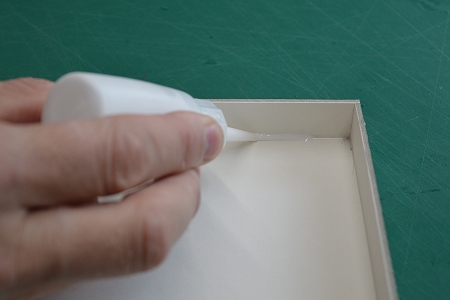
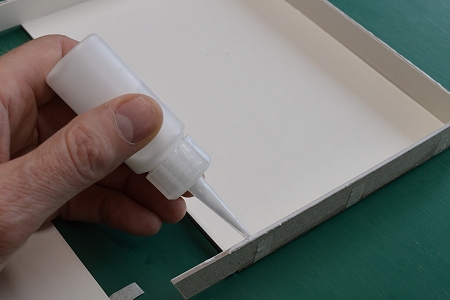
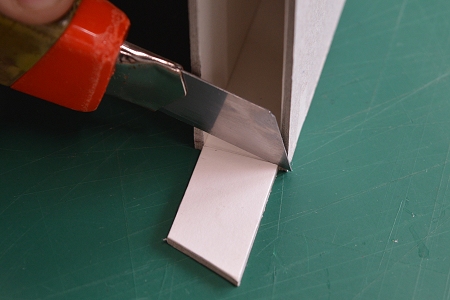
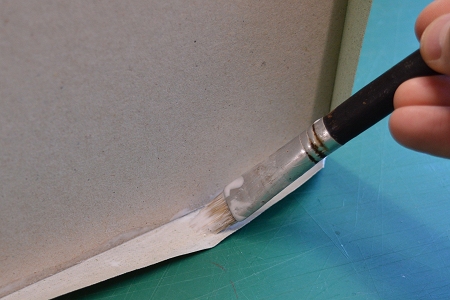
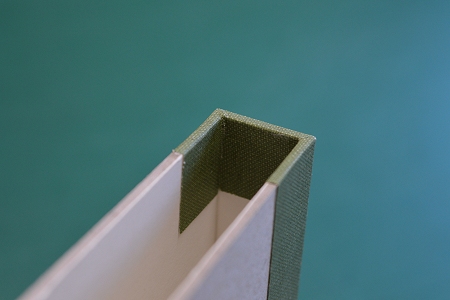
The pieces can now be glued together with PVA. But, before you apply any glue, position small strips of masking tape around three edges of the first side board as shown in [fig 6]. These will be used to secure the case whilst the PVA dries. You can apply the glue using either a brush or a small applicator bottle of the type which can be found in most pound shops. I find these can be a quicker and more precise method of applying the glue [fig 7]. Starting with the spine edge, position the three edge pieces onto the first side board using a block or set square [fig 8] to ensure they are at right angles, and secure using the masking tape strips, wiping away any excess glue with your finger. Any slight gaps showing between the boards can be filled with a little PVA [fig 9].
 |
 |
 |
 |
 |
 |
 |
 |
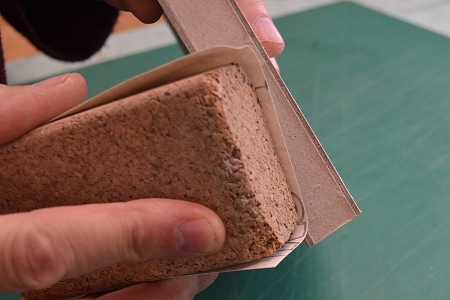 |
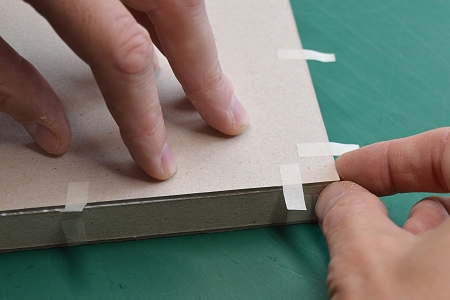
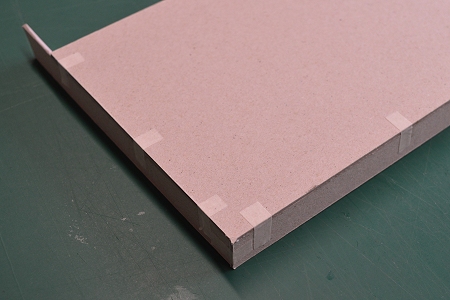
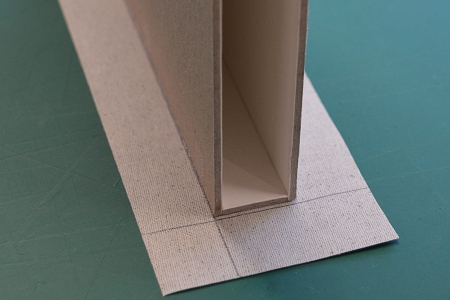
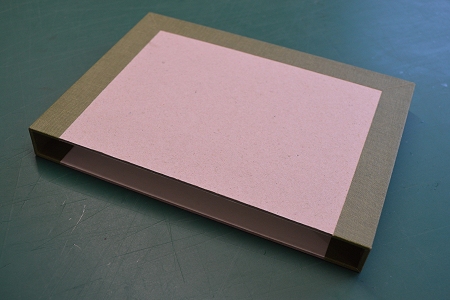
Allow the glue to dry for fifteen minutes or so, and then glue the second side board into position. Put small strips of masking tape around three edges of the second board as you did for the first one, and then apply glue to the three edge pieces already in position [fig 10]. Place the board carefully on the edge pieces and firmly press down the strips of masking tape [Figs 11 and 12]. If you need to push the edge pieces out a little to make the joints absolutely flush you could use your steel ruler on the inside of the case to apply gentle pressure. You may like to put a board and a small weight on top whilst it all dries [fig 13]. When all the glue is completely dry, carefully remove the masking tape and trim off the top and bottom edge pieces flush with the sides using an extended craft knife [fig 14]. Sand off any rough edges if necessary [fig 15].
Covering
There are several different approaches to covering a slipcase. Here we will cover the edges with book cloth and the sides with decorative paper, but you could cover the edges around the opening with thinly pared leather, cover it all with book cloth, or all with paper. There are no rules here, so experiment!
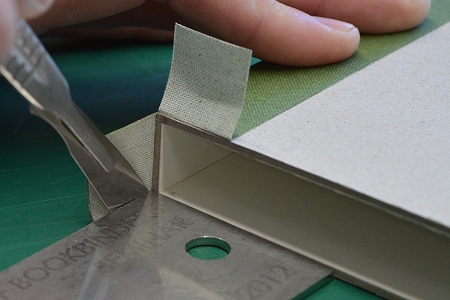
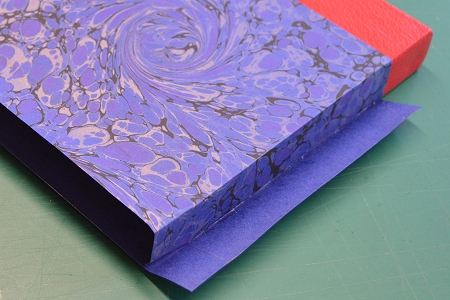
First, cut a strip of book cloth at least 6cm longer than the sum of the three sides and 4cm wider than the depth of the slipcase. Mark a line 2cm from one edge of the strip, and another line 2cm from one end. Apply glue to either the top or bottom edge of the slipcase and position it on the strip using the lines as a guide [fig 16]. Glue up the other two edges and roll the case along the strip keeping the cloth tight, especially at the corners. Trim off the book-cloth strip 2cm from the other end using a ruler and square. This gives you 2cm turn-ins all the way around and at each end.
Ideally, support the slipcase on a small block so as not to crush one side of the strip, then pinch in the book cloth at the two corners and snip off the excess to create a simple corner [fig 17]: the trimmed edges should automatically just overlap. Turn the case over and repeat on the other side. The turn-ins on the edges can now be glued up with PVA and folded over onto the sides of the case [fig 18].
 |
 |
 |
 |
 |
 |
 |
 |
 |
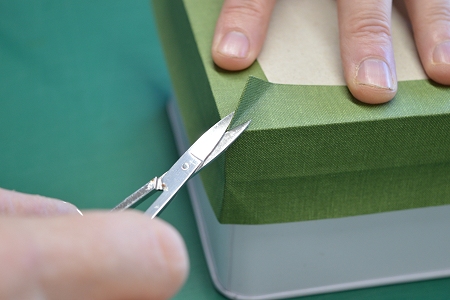
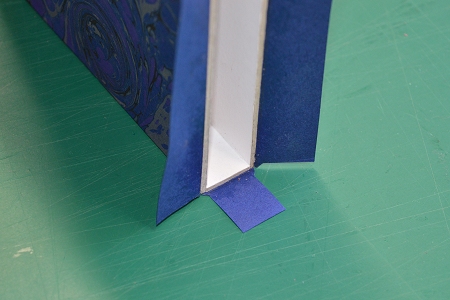
Using a set square, accurately cut the book cloth exactly at the corners of the opening of the slipcase [fig 19] to make three flaps at each end. Then cut 2mm wide strips each side of the corner cuts. These cuts should stop short of the corner by about 2mm. Now trim the strips off at a 45° angle from the corner [fig 20] so that when the tabs are folded in they will meet up exactly [fig 21, 22]. With a little experience, you will find that this can all be done by eye using the thickness of the boards as a guide.
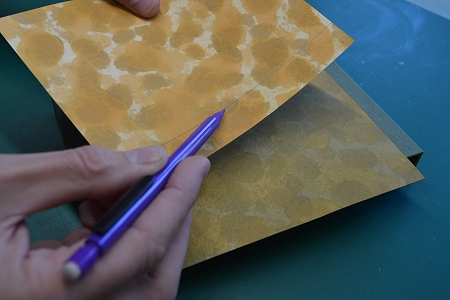
Once the cloth turn-ins are glued in position [fig 23] you can cut your decorative paper. It is your choice how much of the cloth you leave visible on the sides since the paper will overlap the cloth, but the paper turn-ins onto the inside of the case should be the same as the cloth turn-ins, about 2cm, so mark a line on the reverse side of the paper to help you position it [fig 24].
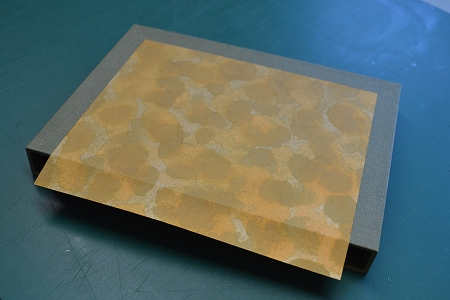
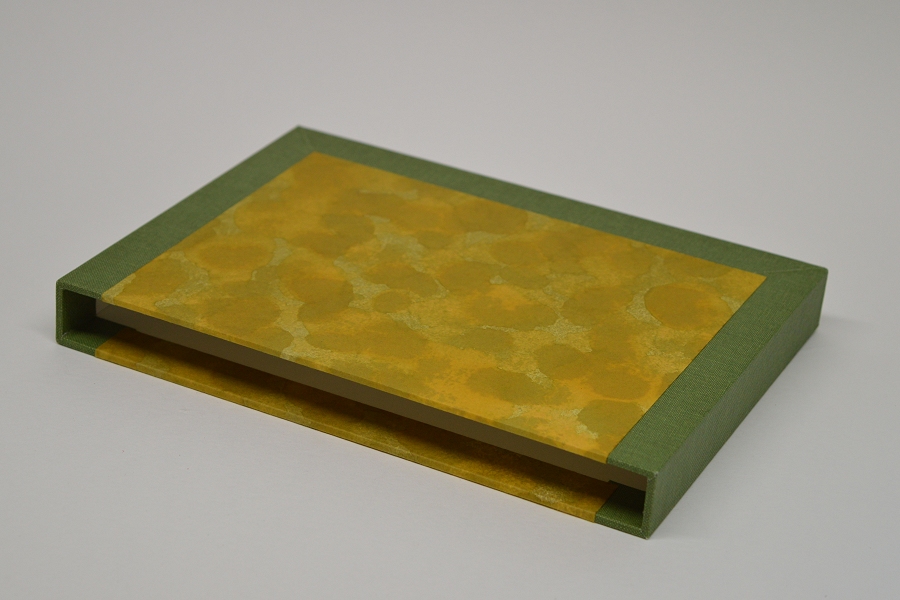
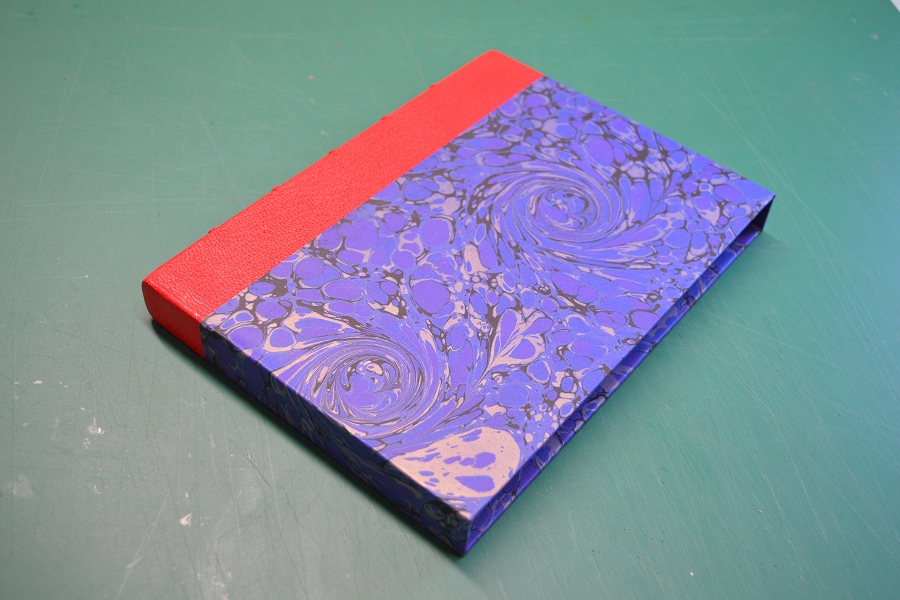
Glue out the paper, position it on the case, and then turn it in [fig 25]. Resist the temptation to try your book in the case until the glue is absolutely dry! Your slipcase is now finished [fig 26].
 |
 |
Alternative Joint Styles
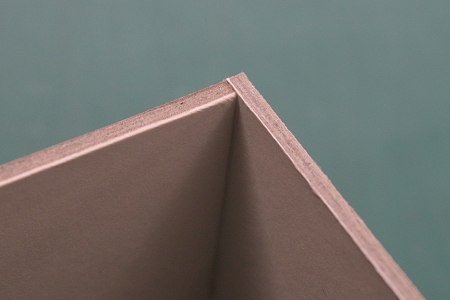
I find that for most situations a simple single-board joint [fig 27] is quite strong enough, especially when you take into account that it is strengthened by the covering material. However, some binders use stepped joints for extra strength. These may certainly be useful for larger or heavier books.
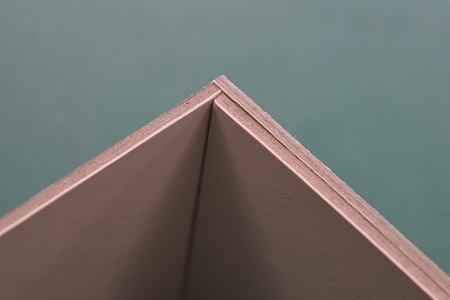
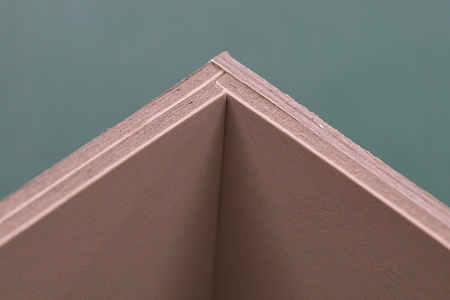
Stepped joints are made using two laminated boards to produce a greater surface area to glue. You could just laminate the edge boards [fig 28] or both the edge boards and the side boards [fig 29], and you can also vary the thickness of the boards being used.
 |
 |
 |
Rounded-Spine Slipcases
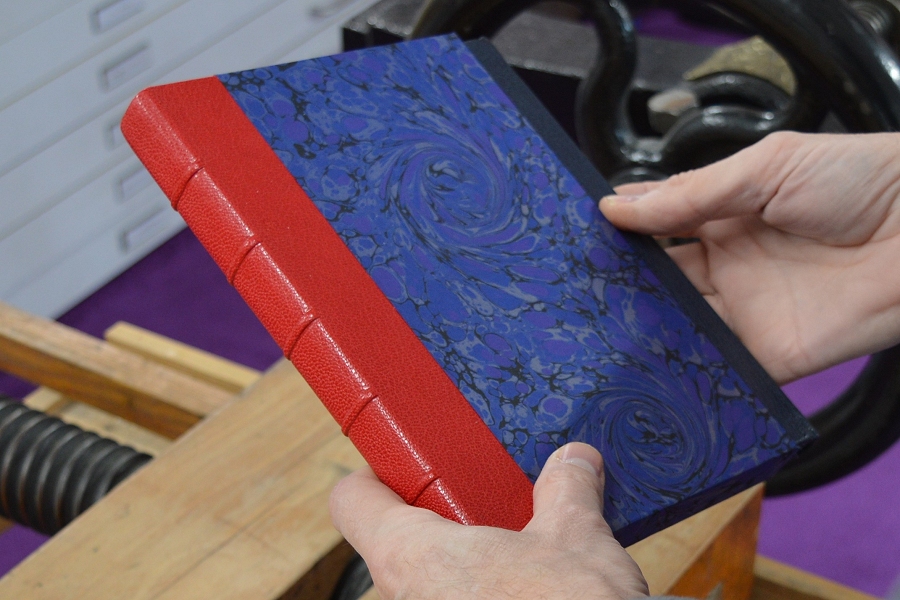
An alternative to the straightforward slipcase described above is one with a rounded spine. This has a spine edge piece made to resemble a traditional looking rounded leather book spine with false raised bands ready for tooling or a label to be added.
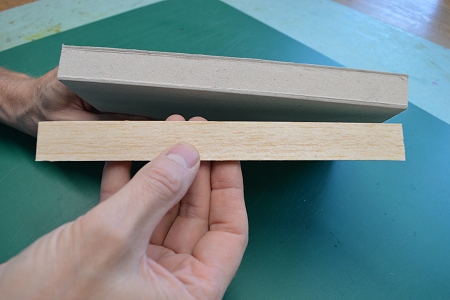
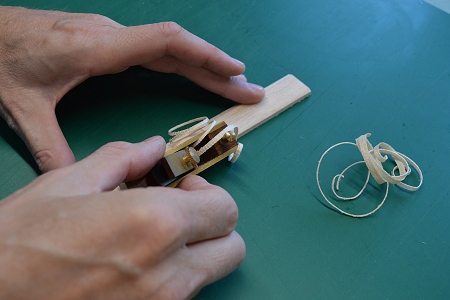
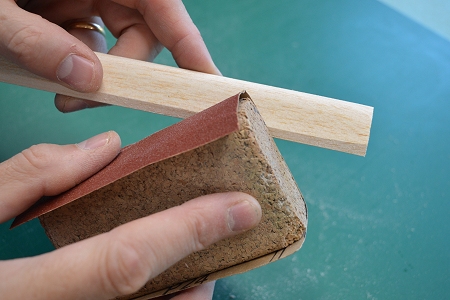
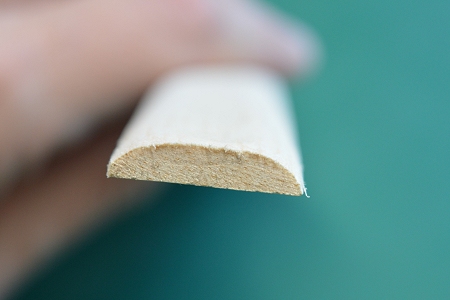
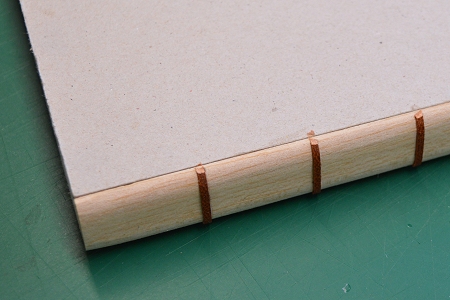
First you need to make a basic slipcase box to fit your book as described in [fig 1] to [fig 15] above. Then take a piece of balsa wood, about 5 or 6mm thick, and cut it with a craft knife to the same width and length as the spine of the box [fig 30]. It is then easy to shape it with a modelling plane [fig 31] and/or sandpaper [fig 32] to create a suitable rounded profile [fig 33]. Secure it to the box with PVA, firmly holding it in place with masking tape while it dries.
 |
 |
 |
 |
 |
 |
 |
 |
 |
 |
 |
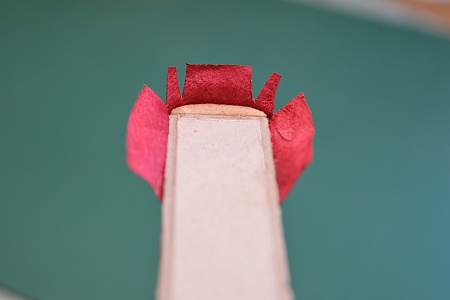
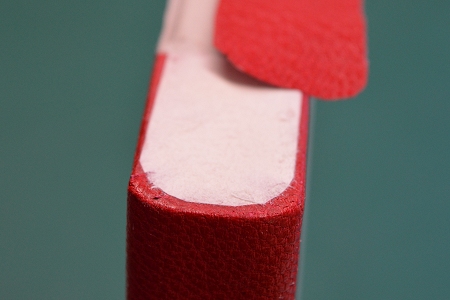
You can then add false bands made of strips of scrap leather trimmed flush with the edge [fig 34]. Then cover the spine of the box with pared leather in the normal way. In this case though, the leather should protrude at the head and tail by a few millimeters and these areas should have been pared as thin as possible. Cut a few nicks out of the leather [fig 35] and turn the resulting strips neatly onto the top and bottom of the case. If necessary, you can fill this area with paper and sand it down to get it as flat as possible before adding a shaped piece of thin leather [fig 36], carefully edge pared to nothing, on the top and bottom [fig 37].
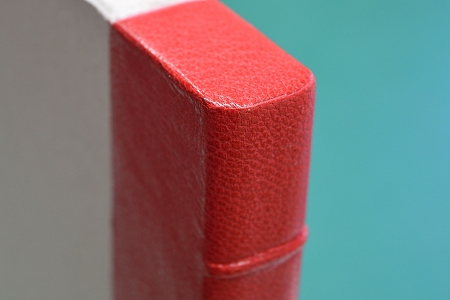
The covering in this example is of marbled paper, but you could of course use cloth or any other decorative material. Wrap your piece of paper around the case, just overlapping the leather along one edge and wide enough to create a 2cm turn-in on the other. It should overlap along the bottom edge of the case [fig 38]. Glue it into position and trim off the inner of the two turn-ins which are created by the overlap at the bottom. Cut the corners in exactly the same way as described above [fig 39] and turn in [fig 40].
If you are intending to do some fine tooling on the spine, you may find it useful to glue kraft paper around the balsa wood before you attach it to the box. This will create a harder surface to help form crisper tooling.

Glenn Malkin only started learning to bind in 2007. He was taught the basics by Alan Fitch and, within nine months, he had set up his own business and was working as a full-time bookbinder. Thanks to the encouragement of Paul Delrue, and to a constant appetite to learn new approaches and techniques, less than a year later he won his first prize for a design binding in the 2009 Designer Bookbinders Annual Competition. Glenn was elected a Licentiate of Designer Bookbinders in 2014 and now divides his time between routine book repair work, creating design bindings, and occasional teaching.
Skin Deep - Volume 46 - Autumn 2018
Download Skin Deep - Volume 46 in PDF Format