

Volume 57 - Spring 2024
Airbrushing for the Artistically Challenged...
by Glenn Malkin
This article first appeared in volume 33 - 2019 of the Society of Bookbinders' Journal 'Bookbinder' and is based on the lecture and demonstration given by Glenn Malkin at the SoB Conference in Bath 2019.
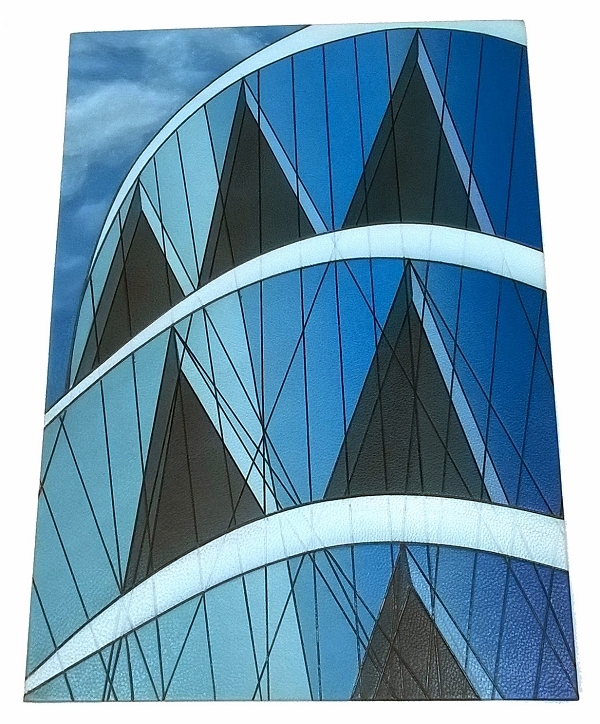
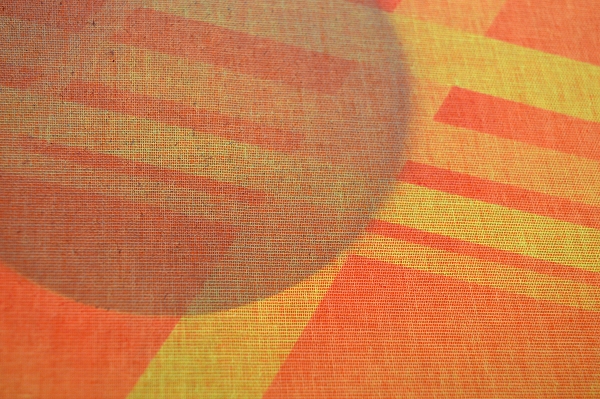
Leather panel decorated only with airbrush and carbon tooled lines.
We are all familiar with airbrushing as an artistic technique - whether it is the masterful artistry displayed on cars, motorbikes and trucks or perhaps the familiar images used to decorate fairground rides. But such airbrushing requires a high level of artistic talent - it is the artist who creates the masterpiece, not the brush. So, it is not surprising that those of us who do not consider ourselves to be accomplished artists tend to shy away from using an airbrush to decorate our books. However, I'd like to explore how an airbrush can be used by anyone to create some wonderful effects and designs and to encourage you to give it a go.
Types of Airbrush
Airbrushing is basically a method of using air to deliver paint or ink onto a surface. This can be achieved in many ways - some simple, some requiring specialist equipment. The simplest form of airbrushing is something like a household spray bottle or an atomiser. When the trigger is pulled, the internal air pressure forces the paint up a tube and through a nozzle where it is ejected as a spray. This is also the same principle as an aerosol can of spray paint which I have seen used very effectively by binders like Mark Cockram. However, depending on the viscosity of the paint/ink being used the colour can often come out in a rather coarse and often inconsistent spray. Individual spots of colour can then be seen which can create some wonderful effects, but doesn't always offer the delicacy that may be required. That's not a reason to dismiss these tools though, as such a grainy colour effect can add fabulous colour-texture to an otherwise flat and plain background.
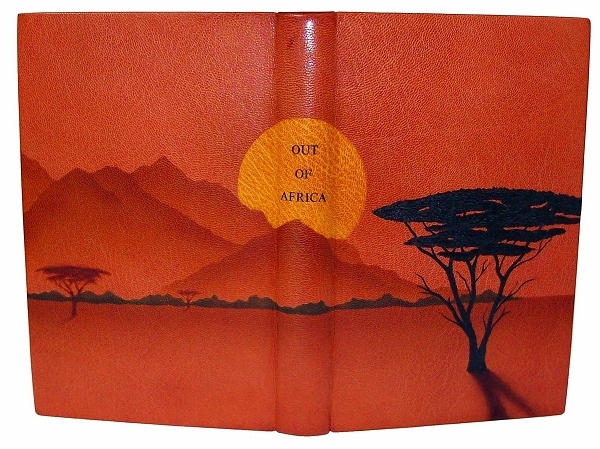
Book cover decorated using an atomiser and diluted Fiebings leather dye.
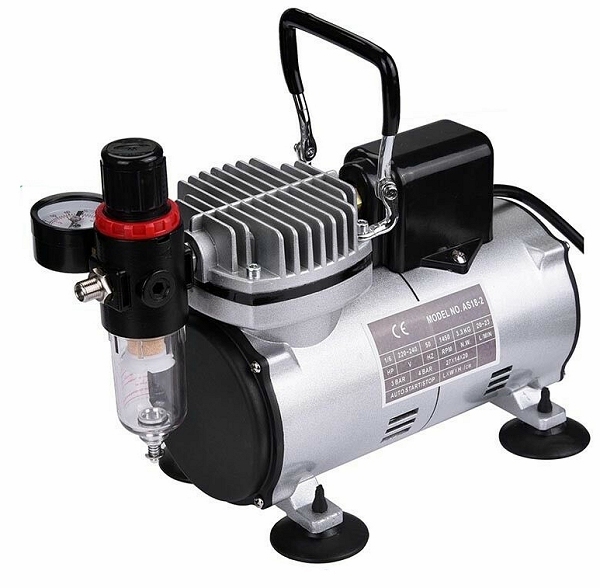
More often than not, the type of airbrush I use is an artist's airbrush in conjunction with a small compressor. Similar airbrushes can be used in exactly the same way but using a canister of air supplied for the purpose. Professional artists who use airbrushes may easily spend £200 on a quality airbrush, plus maybe a similar amount for a compressor. But, perhaps surprisingly, a perfectly acceptable complete airbrush kit and compressor can be bought for around £80 or less online. I would never suggest that these kits are the very best quality, but they have served me extremely well for my purposes. My first such airbrush and compressor lasted me about six years or so before it started to become unreliable. Replacement airbrushes of this type can also be found online for around £20 or so, though there are quite a few different types and fittings that look very similar so be clear about what you need before buying.
 There are several different types of airbrush - single action and dual action being the first choice. The single action airbrush has a trigger which controls the air through the brush. When the air is released through the nozzle, it draws paint into the air-flow and out as a fine mist driven by the force of the air. A dual action airbrush works in a similar way, but the trigger independently controls both the airflow and the amount of paint being drawn into it. Thus, you can allow just a little colour to be ejected or a lot depending on your requirements. The double action airbrush is the type I use.
My airbrush is an internal mix style which just means that the colour is drawn up inside the body of the brush where it mixes with the air at the tip. You can also get external mix brushes where the paint is delivered to the tip via an external tube though with rather less flexibility in controlling the mix. These are usually a bit cheaper than internal mix airbrushes, but having never used one I can't really comment on their pros and cons. Finally, the paint or ink can be held in a bottle below the airbrush (syphon fed) or in a small cup on the top or side of the airbrush (gravity fed). Because I may change colours frequently when working on a book cover, I prefer the advantage of being able to easily swap the bottles on a syphon fed brush. Interestingly though, a side mounted gravity fed style is preferred by most airbrush artists as apparently it is best for very fine detailed work.
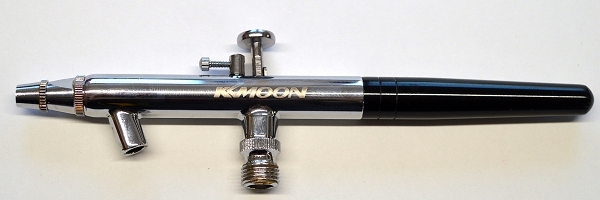
My dual-action syphon-fed airbrush.
Many airbrushes can be used with a canister of air rather than a compressor and this can be a quick and convenient way of working. Depending on how much airbrush work you do it may be a more expensive option in the long run though - a can may be around £10 or so depending on the size.
The compressor I use came as part of the kit and is just fine for what I need. It is a basic and small single piston compressor so it does make a certain amount of noise and I find I do need to have a small in-line water filter to remove excess water from the air which can otherwise cause problems. You can get far more complicated compressors such as those with twin tanks designed to give seamless and constant airflow and quieter operation, but I would say such level of sophistication is unnecessary for the sort of work I do.
Paints and Inks
I have tried several types of paint/ink to use with my airbrush but there are many more alternatives that may be worth investigating. I have experimented with diluted acrylic paint, thinned Feibings Leather dye and proprietary airbrush acrylic colours but the medium I prefer using is acrylic ink, usually diluted with water around 50/50. Whatever you use should have no particulates in as this may block the airbrush and should have a consistency similar to milk. It should also be possible to dilute it to vary the strength of colour. I found that spirit dye dried quickly in the airflow so sometimes produced an irregular result. Acrylic paint seems to have too many particulates, even when well diluted, and airbrush paints weren't always as fast as they could have been on leather. Having said that, I would encourage you to try a wide range of mediums to see what works for you and the materials and style you are working with. In any case, you will need to be able to dismantle and clean the airbrush thoroughly after each use using whatever solvents or materials are necessary to do that. Lack of thorough cleaning is probably the main cause of problems when you next try to use your airbrush.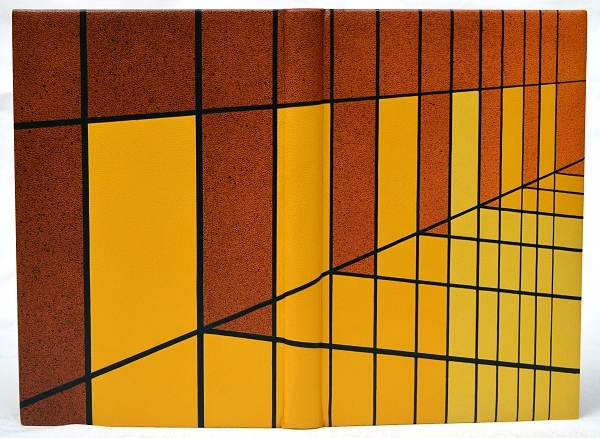
Airbrushed colours enhanced in part with Fiebings leather dye applied using an atomiser.
I usually position my work taped to a large board and propped up so it is nearly vertical. In this way the airbrush is horizontal and easy to control when in use. When using leather, I usually airbrush it before it goes onto the book but after it is pared. The most critical rule of thumb when airbrushing is that many repeated passes of light colour is much better than trying to lay all the colour down in one go. This gives more control, less chance of overloading the surface, more even application and greater flexibility in the effects that you can create.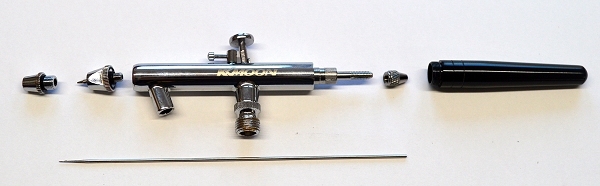
Airbrush shown in pieces for cleaning.
Masks and Stencils
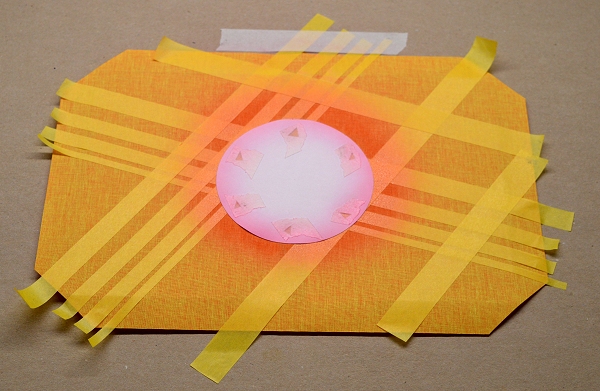
Cloth covered case with mask and tape applied after the first airbrushing stage.
For almost all my work I use some kind of mask or stencil. This is the only way to get sharp edges and to stop paint going where you don't want it to! I use a low-tack decorator's tape like Frog Tape to make straight edges. This is a masking tape that somehow avoids colour seeping under the edges of the tape, and it can be removed from cloth and leather without damage (though for delicate surfaces I usually remove a little of the stickiness by dabbing the tape with my fingers a little before using). Taping a length of tape to the edge of a large piece of scrap paper so only a few mm of sticky surface is showing is enough to create the straight edge whilst masking the rest of the piece with the paper.
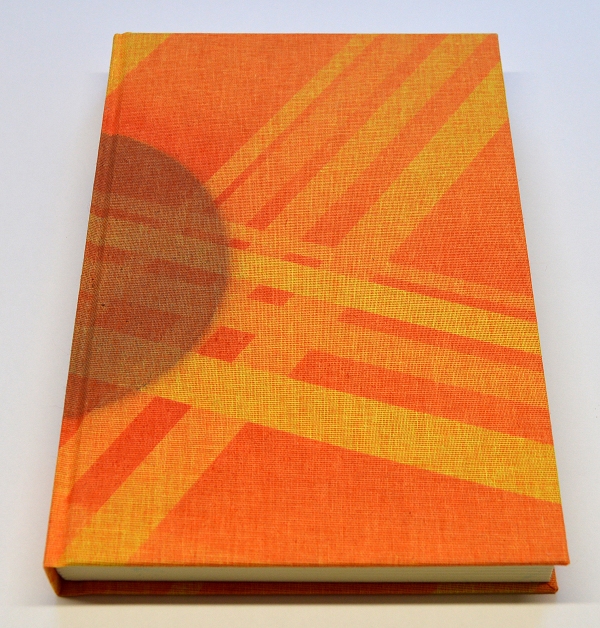
Finished airbrushed case on the book.
Detail of airbrushed layers.
For more complicated shapes, a piece of strong paper can be cut to the required shape, small holes cut every cm or so and a few mm from the edge and tape used to carefully secure the mask to the workpiece. However, a better approach may be to use frisk film. This is a low-tack clear film which is bought on a roll. You simply cut the shape you need, peel off the backing sheet and apply. It does work well with leather and buckrams for example, but sometimes isn't sticky enough to work with other cloths.
With all stencils and masks, always airbrush from the mask side of the edge. That way the air (and colour) doesn't go underneath the mask, lifting it and causing bleed of colour where you don't want it. Also, watch out for colour starting to pool or build up on the mask. This can be a problem with frisk film because you are essentially spraying water onto plastic. If the droplets build up too much you risk them dribbling down your workpiece, so occasionally stop and dab away any droplets.
Decorative Techniques
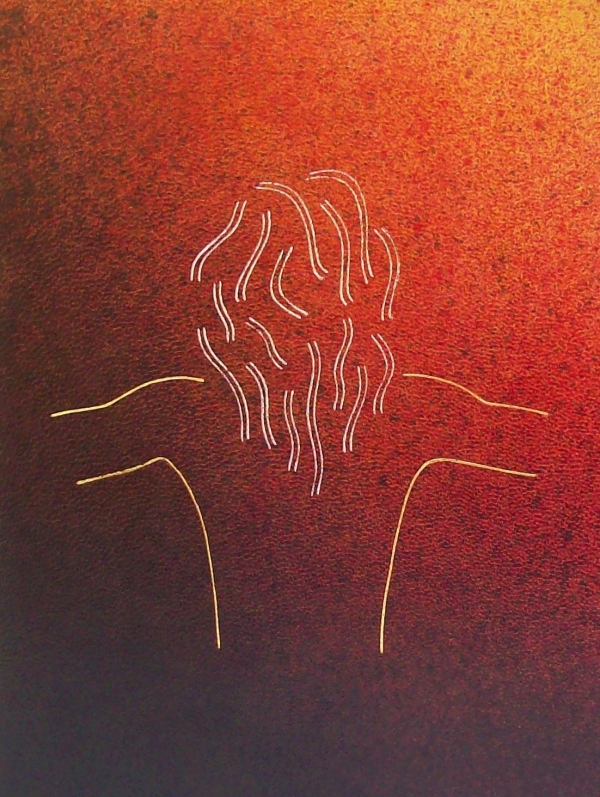
Bear in mind with any mask that you can use the positive or negative space. For example, if you have a profile of a head, the colour can be applied to where the face is, or the face can be the blank area and the colour applied to the space surrounding it.
Use of airbrushed gradients to create the impression of distant hills.
Also experiment with the creative possibility of layering. Airbrushing one edge and then overlapping the next mask and applying more colour starts to give areas with different intensities of colour. This is great for abstract designs, adding far more depth and colour texture than just single applications of colour.
Another great possibility is the creation of gradients. Multiple passes of the airbrush increase the depth of the colour being applied. So, by varying the number of passes across a workpiece as you move up and down it, you start to create a gradient which is smooth. This lends itself to one of my favourite effects - the illusion of distant hills in a landscape design. The farthest hills are pale in colour but the upper edges are nevertheless bolder graduating down to a paler base. Hills a little closer are a little bolder in colour though with the same sort of gradient, and then the foreground hills are bolder still. This is all achieved with a single colour, simply applied a different number of times for each part of the image. Frisk film masks are used to create the sharp edges and to prevent paint being applied where I don't want it.
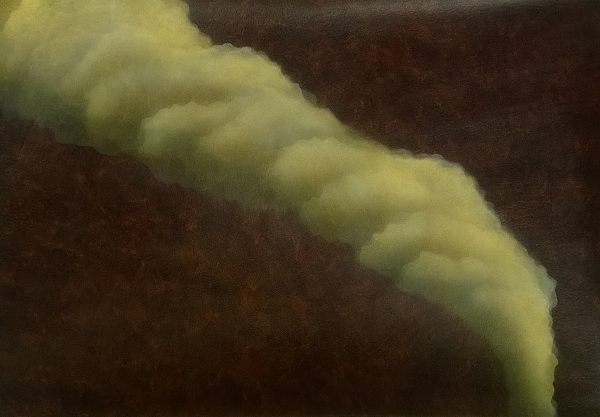
Airbrushed smoke effect using torn paper masks.
If you use the edge of a torn piece of paper for a mask, you can achieve a slightly less sharp edge. I use this approach when creating a cloud (or smoke) effect. Multiple applications are made, moving the mask a little each time and not worrying too much about the mask being pressed flat to the workpiece. The bottom of the cloud is normally darker as it might be in shadow, or perhaps loaded with rain so I change the colour, turn the mask upside down and paint the bottom of the cloud. Play about with colours and make plenty of torn paper masks to vary the edge shapes you get.
Give it a Go!
I couldn't draw a realistic face to save my life, so don't think that if you can't draw you can't use an airbrush. Whether creating background gradients, abstract designs or simple images using masks or templates, this is a technique that encourages you to play, to have fun and to experiment. I feel I am still discovering what I can do with airbrushing and I know there will be approaches, techniques and styles that I can develop and apply to my bindings and that still feels really quite exciting!
 Glenn Malkin has been a professional bookbinder since 2008, establishing Signature Bindings at his home in East Yorkshire, UK. After spending a little time with Paul Delrue, he started design binding in 2009 and won a prize in his first Designer Bookbinders annual competition. After numerous other awards for his bindings, he was elected a Fellow of Designer Bookbinders in 2022 and now shares his time between routine binding and repair work, design bindings, individual tuition and running workshops.
Glenn can be found online at: signaturebindings.co.uk/wp
Skin Deep - Volume 57 - Spring 2024
Download Skin Deep - Volume 57 in PDF Format