

Volume 36 - Autumn 2013
The Cambridge Panel
A step-by-step tutorial - by Nick Cowlishaw
This article first appeared in the 2010 edition of the 'Society of Bookbinders' journal, Bookbinder.
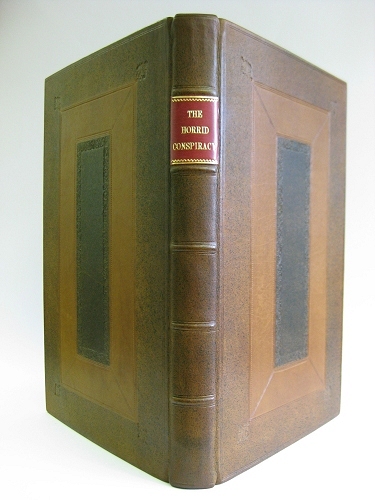
The Cambridge Panel, also referred to as Cambridge Calf or Cambridge Style, is a cover design which began to emerge around 1690, becoming established as the predominant style for plain leather bindings during the first thirty years of the 18th century.
David Pearson in his book English Bookbinding Styles states that Cambridge Panel Style is an inappropriate term as it was extensively used in all English bookbinding centres, not just in Cambridge, and there is no evidence to suggest that it originated there. Graham Pollard in his article Changes in the style of Bookbinding 1550 till 1830 which appeared in the 1956 edition of the Library, traced the terminology as far back as 1849.
There is speculation that the style was highly favoured by Cambridge binders in the early years of the eighteenth century and it became recognised as their speciality.
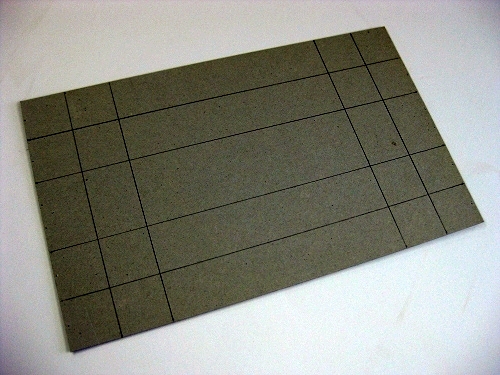
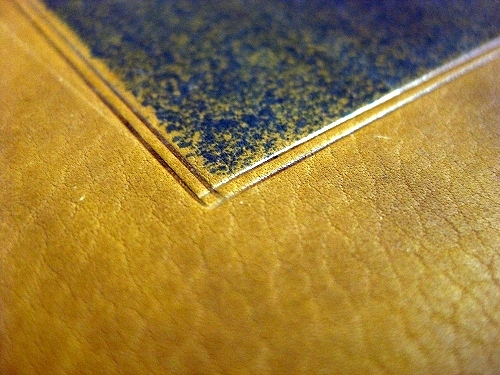
The defining features are three panels created with three rectangular frames and the use of a dye sprinkled on the leather to create varying degrees of density. The characteristic blind tooling consists of a double blind line, a decorative roll around the central rectangle and corner tools. The spine had a red leather label and double blind lines at head and tail and on each side of the raised bands.
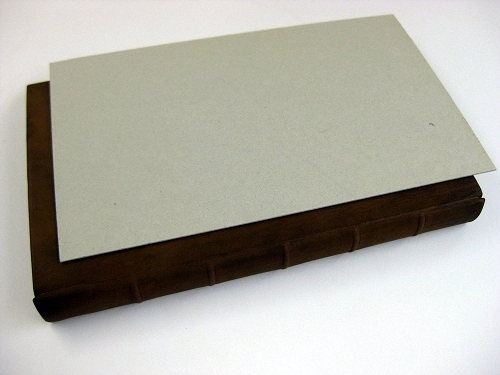
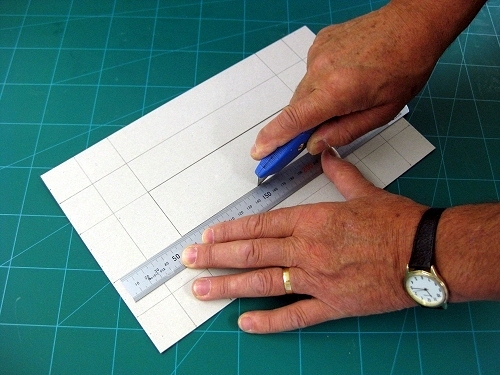
A one millimetre grey board template is cut to the same size as the cover board. |
 |
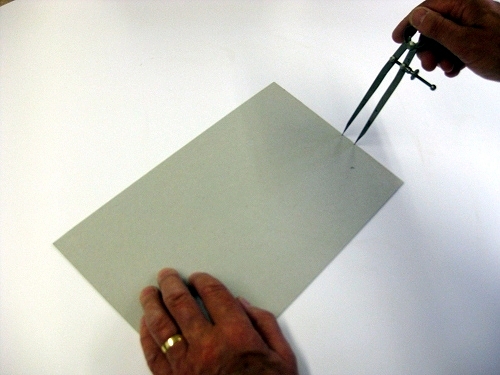 |
The width of the board is divided into eleven equal parts. |
Four vertical pencil lines, two elevenths in width, are drawn parallel with the long edge of the template leaving three elevenths in the centre. |
 |
 |
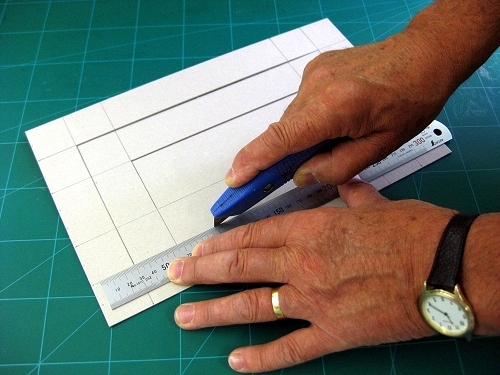
Two horizontal pencil lines, two elevenths in width, are drawn parallel with the short edge of the template at the top and bottom. |
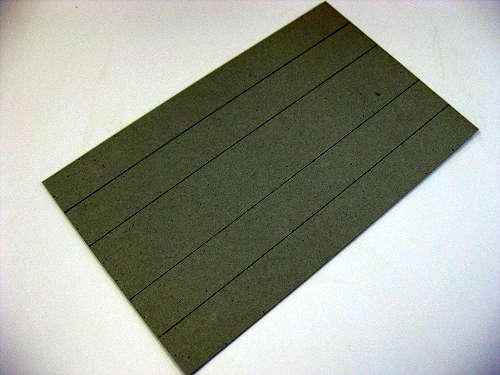
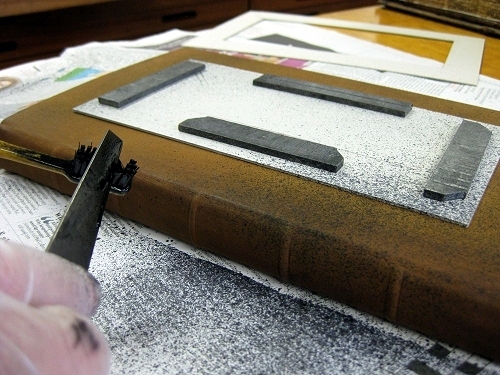
The inner rectangle is cut out and left in position. |
 |
 |
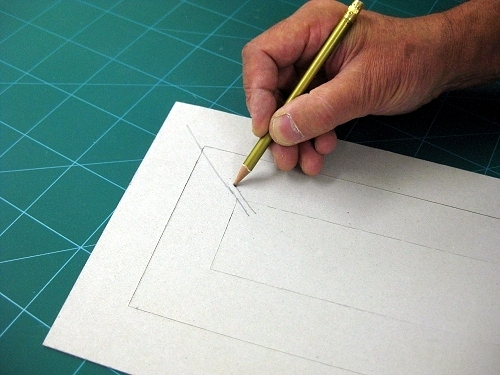
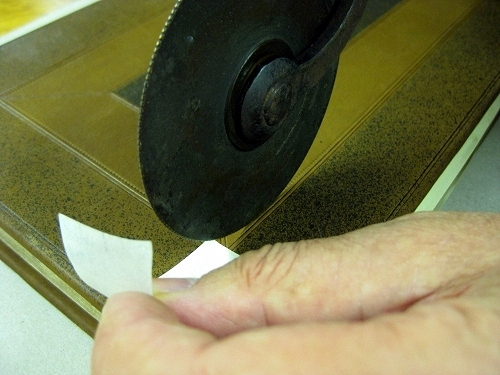
A cut is made around the outer frame. |
Diagonal pencil lines are drawn across the corners of the three rectangles to ensure that the template fits back together correctly after being separated. |
 |
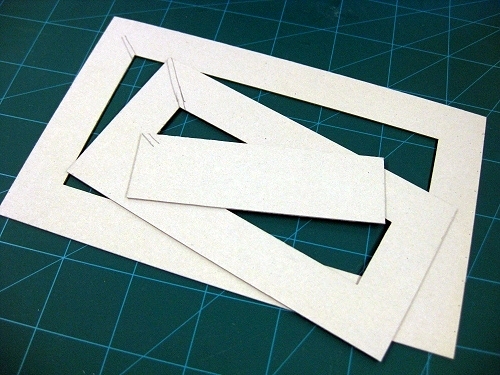 |
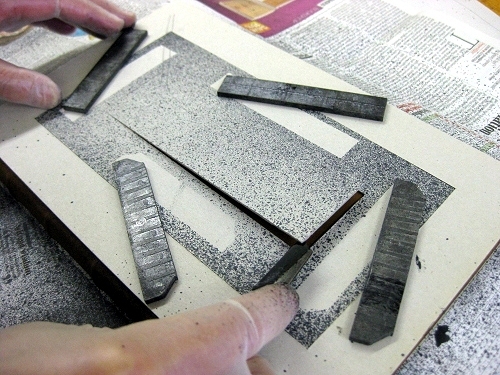
The three parts of the template. |
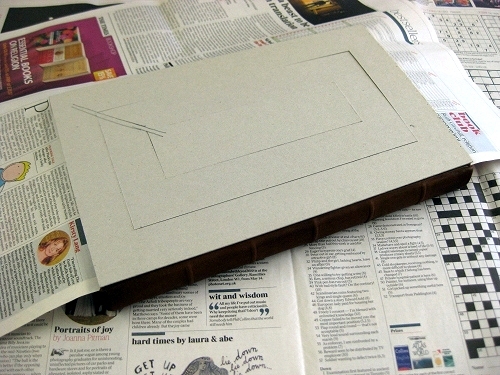
The book is placed on waste paper and a large sheet |
 |
 |
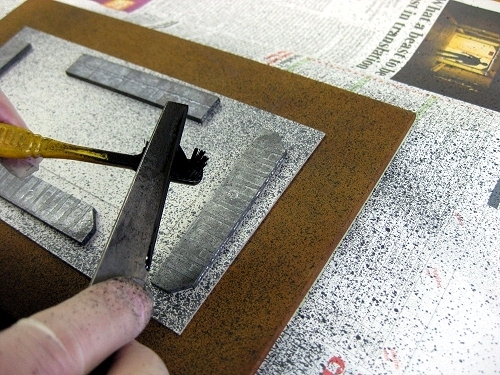
Four flat weights are placed on the central part of the template and the outer frame removed. |
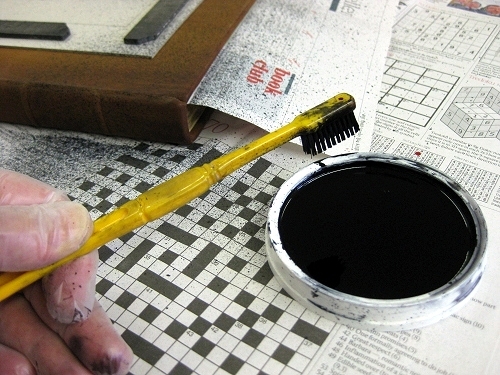
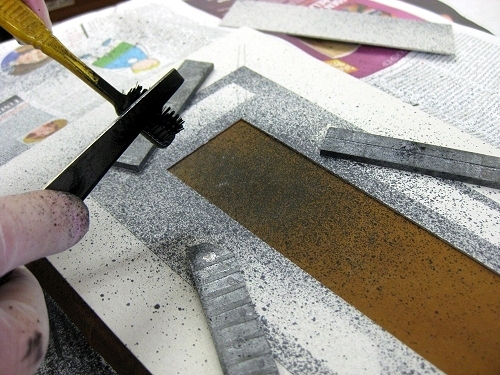
Black spirit dye and an old toothbrush are used for sprinkling. The dye just covers the bottom of a shallow dish and the tips of the toothbrush bristles touch the surface of the dye. |
 |
 |
A knife is drawn from the end of the toothbrush towards the handle to release a fine spray of dye towards the cover of the book. It is advisable to practice this technique on waste paper before sprinkling the book. |
The spine and exposed outer rectangle are sprinkled in a light even pattern. |
 |
 |
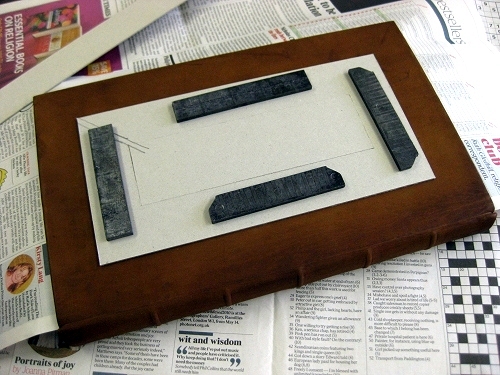
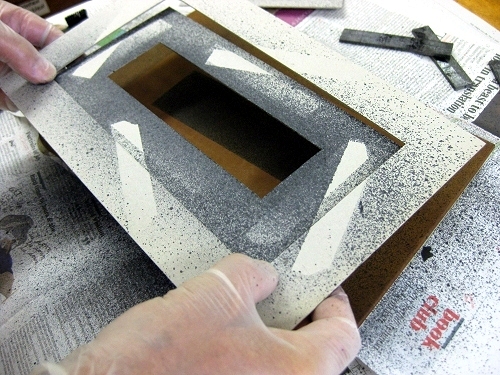
The outer frame is replaced. |
The weights are repositioned to hold both outer frames and the inner rectangle carefully removed with the tip of the knife. |
 |
 |
The central panel is sprinkled with a darker, denser pattern. |
The weights and template are removed. |
 |
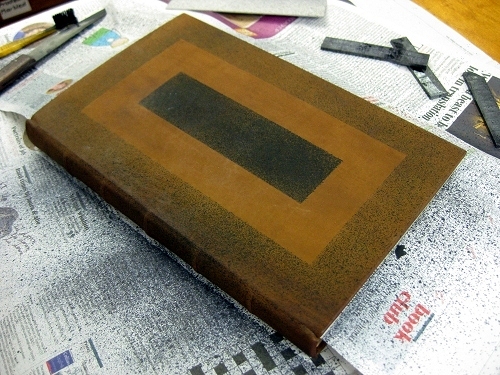 |
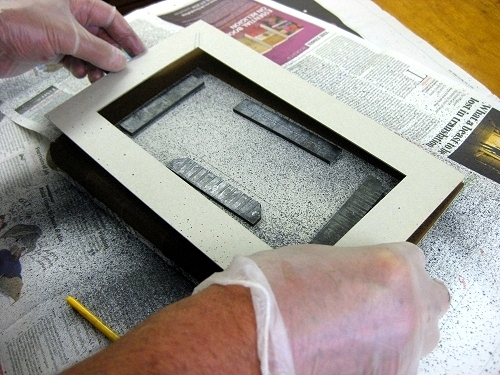
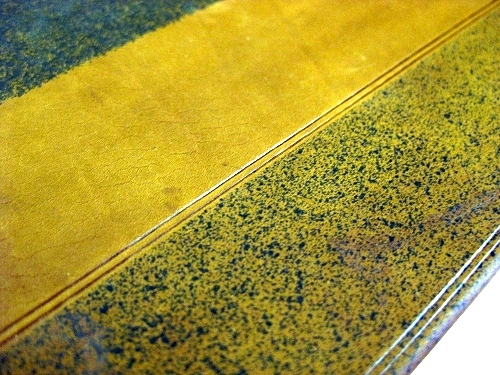
The sprinkled side. |
Both sides of the book sprinkled. |
 |
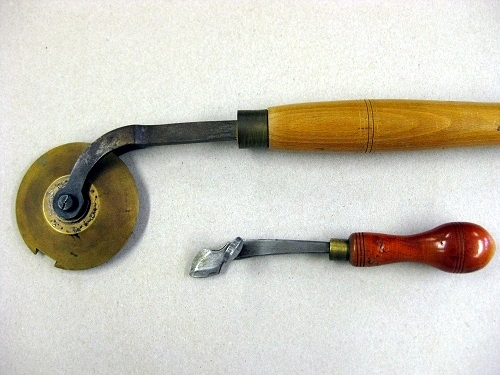 |
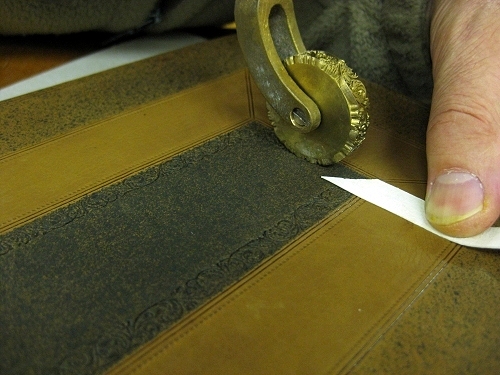
Blind lines around the three rectangles can be produced with either a two line fillet or adjustable leather creaser. |
A strip of millboard and dividers are used to establish the position of the double line around the edge of the board. |
 |
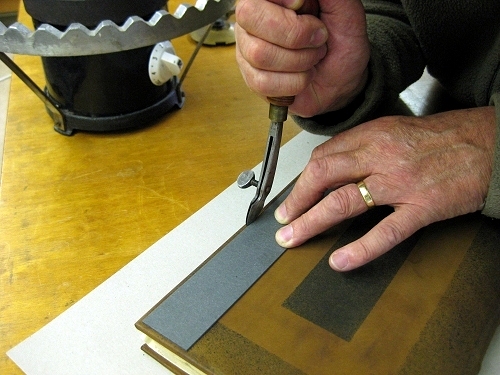 |
The warm creaser is run around the edge of the cover board using the millboard strip as a guide. |
The millboard strip is positioned on the edge of the lighter sprinkled pattern and the creaser run around the perimeter. |
 |
 |
The double blind lines on both edges of the lighter sprinkled pattern. |
The board is sighted on the edge of the darker sprinkled pattern and the creaser run around the perimeter. |
 |
 |
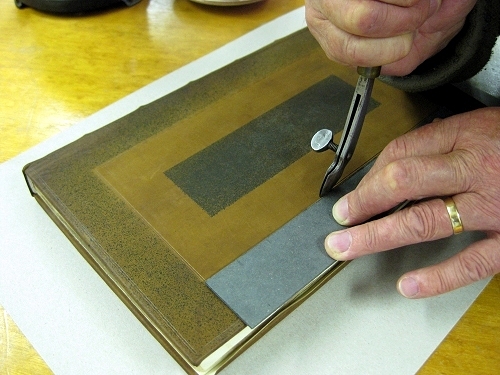
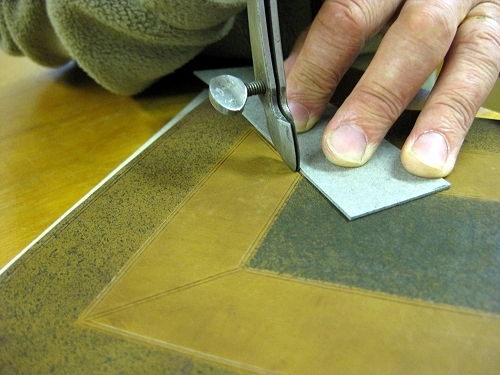
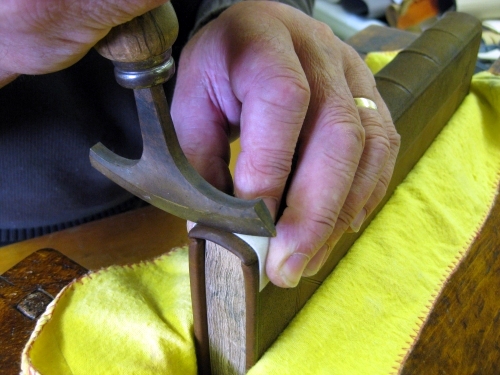
Accurate corner mitres can be achieved with the creaser. |
A double blind line links the corner of the centre panel with the inner corner of the outer frame. |
 |
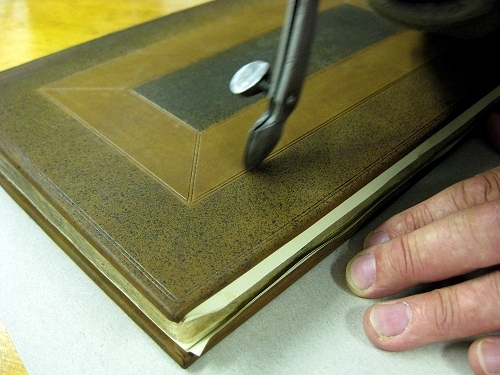 |
A slightly hotter tool is used in the first impressions to darken the lines and make them more prominent. |
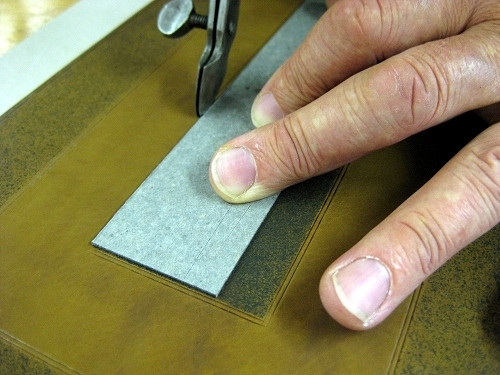
A warm dotted roll is sighted by eye and run around both edges of the centre frame. |
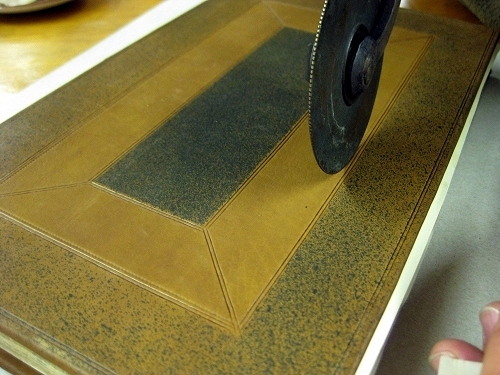 |
 |
A strip of vellum held in position provides a stop for the roll. |
A decorative roll is used around the inside perimeter of the darker centre panel and the corners mitred using a strip of vellum with the end cut at forty five degrees. |
 |
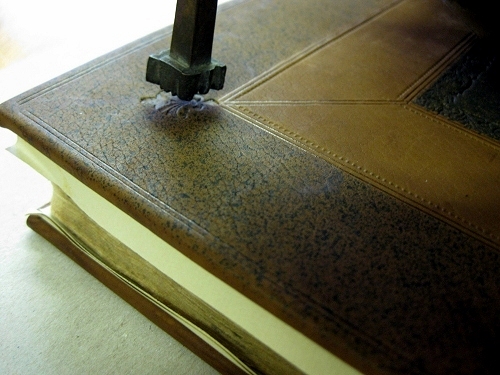 |
An appropriate centre tool is impressed into the leather at each outer corner of the centre frame. |
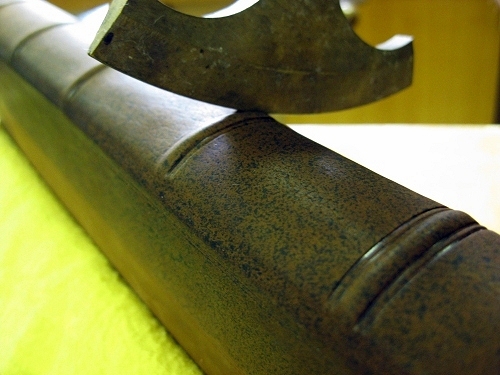
A warm two line pallet is impressed on each side of the raised bands to give a double blind line |
 |
 |
The pallet is impressed at the head and tail of the spine using the strip of vellum as a guide. |
Nick Cowlishaw served a six-year apprenticeship in hand bookbinding in the early 1960s before working as a journeyman for several bookbinding firms in the UK and overseas. In 1978 he turned his skills to teaching and joined the staff of the London College of Printing. He became a Senior Lecturer in bookbinding and remained at the college until 1996, when he left to start his own bookbinding business in Reigate, Surrey, with his wife, Charlotte. In 2007 they moved to Kent and their bindery and business soon followed. Nick taught the intermediate and advanced classes for one day a week at Morley College in London up until 2011.
In 2012 Nick and his wife produced three DVDs on Traditional Bookbinding Technique - www.cowlishawbookbinding.co.uk
Skin Deep - Volume 36 - Autumn 2013
Download Skin Deep - Volume 36 in PDF Format