

Volume 5 - Spring 1998
Foredge Painting
The following article was written by Frank Hippman, and is reproduced here with his kind permission. It first appeared in the December 1993 Society of Bookbinders Newsletter. It was written following a demonstration given by John Mitchell, at the Society of Bookbinders Conference 1993, which was held in Bristol.
In this form of decoration, a picture is painted on very narrow strips at the edges of the pages which are exposed when the leaves are spread out and then the actual edges are gilded. When the book is shut, most or all, of the picture is hidden under the gilding.
For a satisfactory foredge painting thin paper is essential. Select a fine detail painting to copy. Use tablet watercolours in bright shades and fine brushes to get the best results.
Plane gilding boards to about 20 degrees, and sharpen scrapers to fine, even edges. Acquire a baseboard, the size of the book, another board strip, the length of the book, and two clamps. Prepare size from silicone-free starch, such as Robin. Mix a small quantity with cold water then add boiling water; simmer for two to three minutes to dissolve all the grains and then strain through a fine mesh.
In all operations it is essential that the edge is not touched with the fingers, nor dust allowed to settle on the paper.
To prevent leaves sticking together, fan then out and apply powder, baby powder is excellent and has the bonus that is smells nice.
Clamp the book
tightly in the lying press between the gilding boards, as for normal gilding.
Scrape the edge but if it has been ploughed well this stage is not necessary.
The next stage requires the use of a medium-to-fine abrasive paper, such as
garnet, which should be of good quality because any grit becoming detached from
its backing tends to become embedded in the paper. Wrap a piece of the abrasive
paper around a suitably sized dowel and rub it along the edge. Do this gently
because any heat generated causes the leaves to fuse together and reject the
watercolour. An alternative is to use the fingers so that any heat generated
can be felt and the action suspended.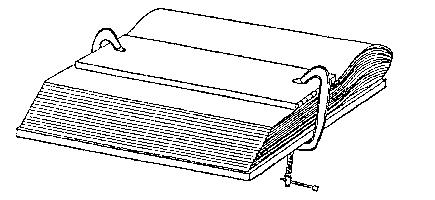
Apply size with a squirrel-hair or pony-hair brush to seal the edges of the leaves, and leave for about 20 minutes to dry. Consolidate the edges by using a dog-tooth burnisher.
Remove the book from the press. Deform the foredge and clamp it between the baseboard and strip. Place the clamped book in a convenient position on the bench; a wrist support may be helpful.
Outline the design, either directly on the foredge, or via a tracing. Mix the watercolours with size, not water, to a very thin consistency and paint with light downward strokes only.
When dry, release the clamps and allow the book to resume its natural shape. Free the edges by slapping the book on the bench. Powder again. If the paint used was thinned with water instead of size, the paint needs to be sealed with a 'charcoal drawing' spray.
Before going on to the gilding operation, the book must be put in the lying press again and all colour removed from the leaf edges by applying abrasive paper again, to allow the gold to stick.
One can now gild the foredge in the normal way except that, because of the necessity not to obscure the painting, bole is not used.
John Mitchell- completed his apprenticeship at W.H. Smith as a gold finisher. He started teaching in 1964 at the London College of Printing until 1983. During this time he was also an examiner for the City & Guilds Examination Board. Since 1983, he has also taught and lectured at Guildford College, Brunel College, Roehampton Institute and the Berkshire College of Art & Design.
He was Chairman of the Society of Bookbinders from 1995 - 1997.
Skin Deep - Volume 5 - Spring 1998
Download Skin Deep - Volume 5 in PDF Format